Loading

A 90-degree configuration defines a corner condition—not the panel destination. Panels may still stack along either elevation or move into wall pockets.

Pocket, Multi-Track, Bypass or 90-Degree? Planning a Sliding Layout for a Large Opening

Home / Archive by category "BLOG"

Two framed openings with the same width and height can provide very different results. In one, the panels may overlap and remain visible after opening. In another, they may disappear into a wall pocket. A third configuration may connect two sides of a room at a corner.

These terms do not always describe competing systems. Pocket identifies where the panels are stored, multi-track identifies the track arrangement, bypass describes how panels pass one another, and 90-degree identifies the geometry of the opening. A single project may combine several of these characteristics.

Once the project team understands how an operable glass opening will affect the adjoining spaces, the next step is to determine how the panels should travel and where they should finish.

Pocket identifies where the panels are stored, multi-track identifies the track arrangement, bypass describes how panels pass one another, and 90-degree defines the opening geometry

Start With Three Decisions: Geometry, Panel Travel and Storage

A configuration name does not always explain the complete panel arrangement. The decision becomes clearer when it is divided into three parts:

  • Opening geometry: Is the opening straight, or do two elevations meet at a corner?
  • Panel travel: Which panels will move, in what direction and past which other panels?
  • Panel storage: Will the open panels remain within the framed opening, collect near one or both sides, or move into a concealed wall cavity?

Together, these decisions determine how much usable passage remains. The framed width describes the complete opening, while the clear opening is the unobstructed space available after the panels move. Panel width, overlap and storage position can make that passage considerably narrower than the original framed dimensions.

Clear passage can also affect accessibility compliance. Where a doorway is part of an accessible route and subject to the ADA Standards, Section 404.2.3 requires a minimum clear width of 32 inches. The U.S. Access Board illustrates this requirement with an open sliding door. This does not establish the correct width for every project; occupancy, maneuvering clearances, local codes and intended traffic must still be reviewed.

Configuration names are not standardized across every manufacturer. Project teams should verify the panel sequence in the system drawings rather than assume that the same label always describes the same operation.

Pocket Systems for Large Glass Openings

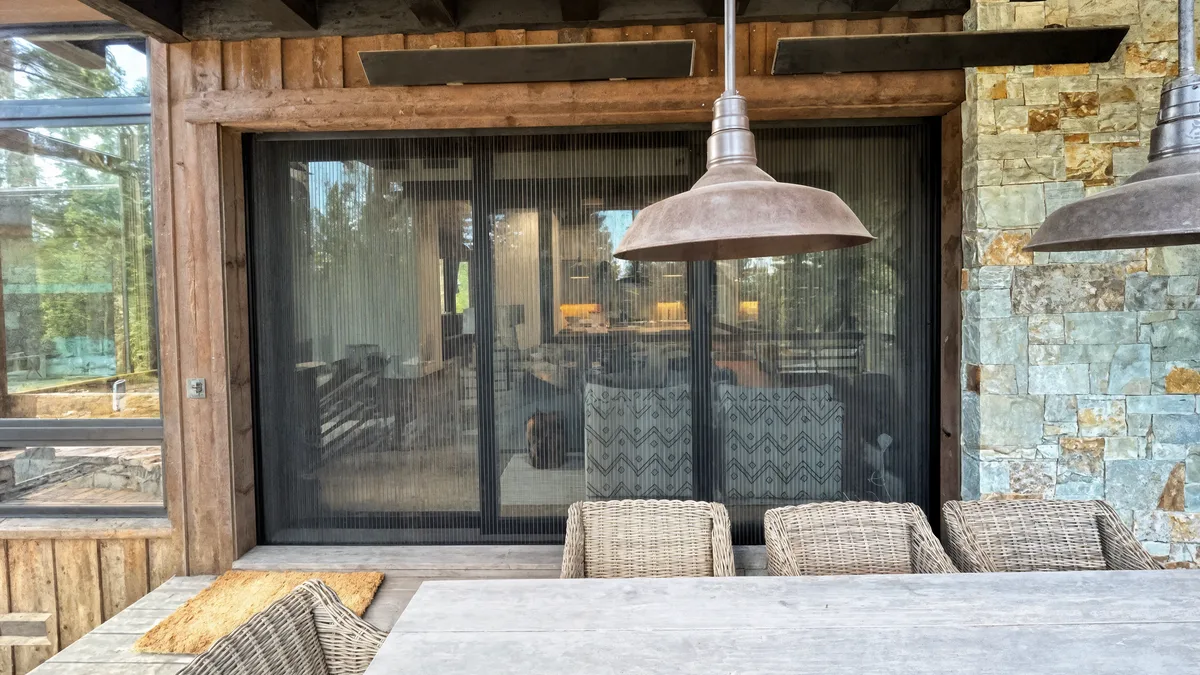
In a pocket layout, the sliding panels move into a designated cavity within the adjacent wall. This removes them from the visible portion of the opening and can preserve a broad view when the system is open.

The pocket must be planned before the surrounding wall is completed. Its dimensions need to accommodate the panels, vertical profiles and any interlocking components that enter the cavity. The design must also allow access to parts that may eventually require adjustment, cleaning or service.

In an exterior wall, the pocket must be coordinated with waterproofing, drainage and insulation. These conditions are considerably more difficult to address after the framing and finishes are in place.

A pocket layout may use more than one track and can form part of either a straight or corner opening. It is therefore a storage method rather than a complete description of the panel operation. The approach works best when the panels need to disappear and the adjacent wall provides enough space for concealed storage and service access.

Multi-Track, Bypass and Wall Layouts for Large Glass Openings

Projects without space for a wall pocket can keep the panels within the framed opening through a multi-track, bypass or wall layout. These arrangements differ in how the panels move and which sections remain occupied after opening.

Multi-track layouts

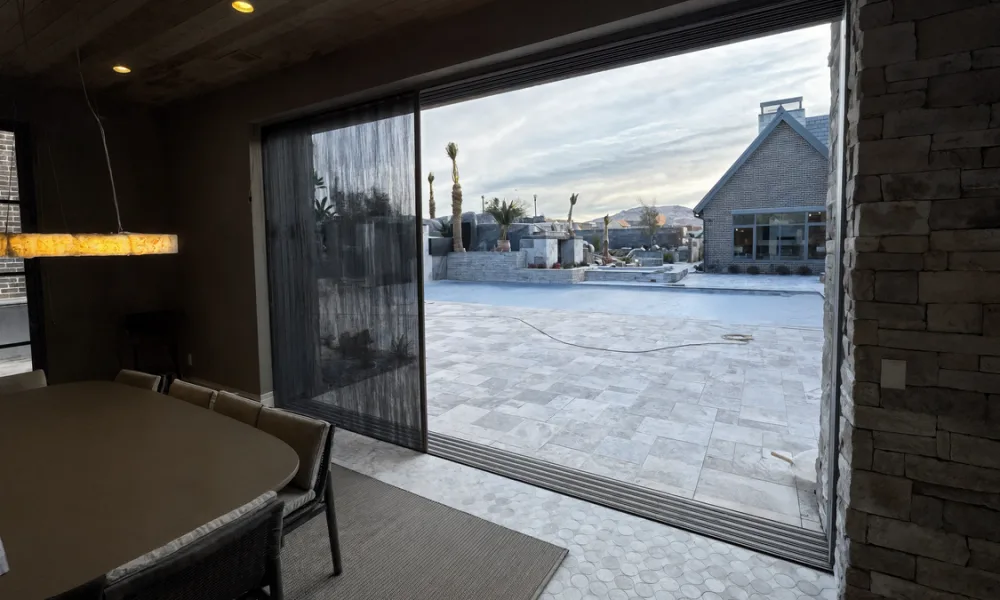
A multi-track sliding door system uses parallel tracks so several panels can travel across the opening and collect near one or both ends. The exact operating sequence depends on the panel arrangement and hardware.

This layout can create a broader passage than a conventional fixed-and-sliding pair without requiring concealed storage inside the wall. The stacked panels remain visible, however, and occupy part of the original opening. Additional tracks may also increase the depth of the sill and head track, which must fit the surrounding floor and wall construction.

Bypass layouts

In a bypass sliding system, panels travel past one another on separate tracks. Their final position determines which section becomes available for passage and which remains covered by overlapping panels.

Within a large architectural glass opening, a bypass arrangement may provide access through selected sections without requiring all moving panels to collect at the same end. The exact sequence must be confirmed in the system drawings because manufacturers may use the term for different arrangements.

Wall layouts

A wall layout combines fixed and operable panels within the same aluminum-framed opening. Only selected sections provide access, while the fixed areas maintain glass coverage and exterior views.

This arrangement works well when the project needs a broad glazed elevation but only certain areas must open. Establishing the position of the fixed panels early helps align the available passage with interior circulation and the intended exterior use.

Layout

Where the panels finish

Wall cavity required

Effect on the opening

Pocket

Inside the adjacent wall

Yes

Panels can disappear from view

Multi-track

Stacked along parallel tracks

No

Several panels remain visible

Bypass

Overlapping within the opening

No

Part of the opening remains occupied

Wall

Within selected areas of the framed opening

No

Only designated sections provide access

The framed width and clear opening are not the same. Panel overlap, stacking position and storage space determine how much usable passage remains.

90-Degree Systems: Planning an Open Corner

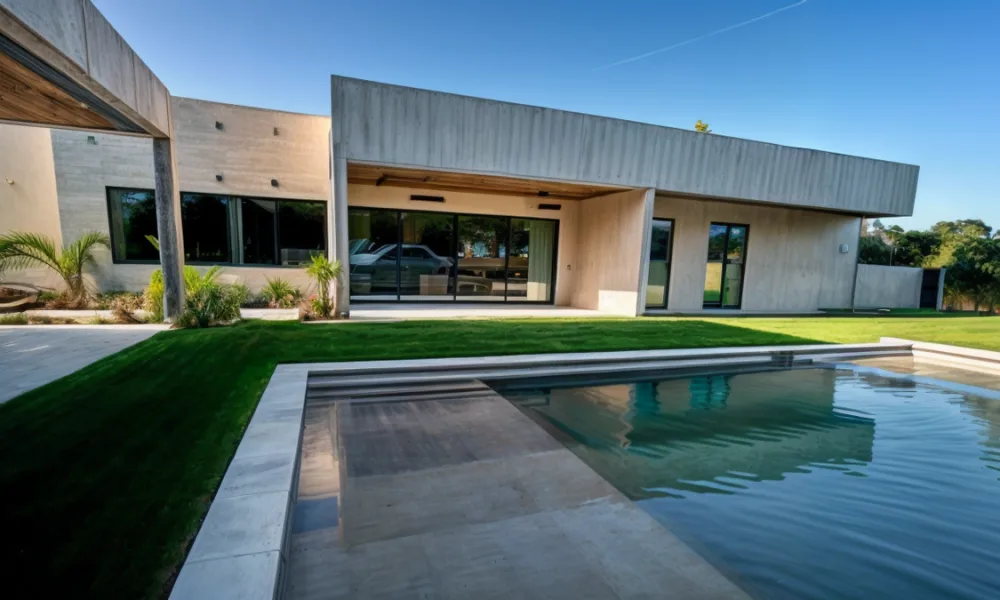
A 90-degree system brings two sliding assemblies together at a corner. Instead of opening a single straight elevation, the panels move away from the meeting point to connect two sides of the interior with the exterior.

The term describes the geometry of the opening, not where the panels will finish. A 90-degree layout may allow panels to stack along each elevation or move toward wall pockets, depending on the selected system.

The corner condition must be defined early. Some assemblies use a corner post, while compatible open-corner designs may clear the meeting point after the panels move. A 90-degree label alone does not confirm that the corner will be post-free.

Track alignment, locking, floor conditions and panel movement must be coordinated across both sides. The surrounding structure also requires review so that the corner arrangement does not interfere with panel alignment or operation. Because the design affects two elevations, late changes may alter the framing, finishes or stacking space on either side.

Which Layout Fits the Project?

Available wall space, required passage and opening geometry usually narrow the options before appearance is considered.

Project condition

Layout to evaluate first

Panels should disappear from view

Pocket

No wall cavity is available

Multi-track, bypass or wall

Only selected sections need to open

Wall or bypass

Several panels must collect progressively

Multi-track

Two elevations meet at an operable corner

90-degree

Access inside a wall cavity would be difficult

Non-pocket layout

Maximum usable passage is important

Compare stacking and panel storage

The matrix provides a starting point; the final arrangement still depends on the complete assembly and project drawings. Before moving into technical specifications, the project team should answer three questions:

  1. What clear passage is required?
  2. Where can the panels collect or be stored?
  3. What wall, floor and structural conditions limit the layout?

Once those conditions are established, the team can review the other details to consider before buying sliding glass doors, including glazing, hardware, finishes and project coordination.

From Layout Planning to a Project-Specific System

The appropriate layout provides the required passage while giving every moving panel a practical destination. It must also fit the available wall space, floor conditions and geometry around the opening.

PRL’s Max Slider family includes multiple panel arrangements for residential, commercial and hospitality openings. The final layout should be confirmed against the selected series, glazing, project drawings and required panel movement.

Modern aluminum window system with fixed, casement and awning configurations installed in a contemporary interior.

Parts of a Window: Names, Functions and Diagrams

Home / Archive by category "BLOG"

Frame, sash, glazing, hardware, gaskets and drainage paths are separate parts of a window assembly. Using the correct names makes it easier to review drawings or identify a component.

The parts change with the window type. Operable units need movement and locking components; fixed windows do not. This guide explains modern window anatomy and the differences among fixed, casement and awning configurations.

What Are the Main Parts of a Window?

A typical operable window has five main component groups: frame, sash, glazing, hardware, and sealing or drainage components. Not every configuration uses the same pieces.

Main component

Basic function

Frame

Surrounds and supports the window assembly

Sash

Holds the glass and moves within an operable unit

Glass or glazing unit

Provides daylight, visibility and part of the thermal barrier

Hardware

Allows the sash to open, close and lock

Sealing and drainage components

Help manage air, water and incidental moisture

A fixed, direct-glazed window retains the glass in the main frame and omits the operable sash and hardware.

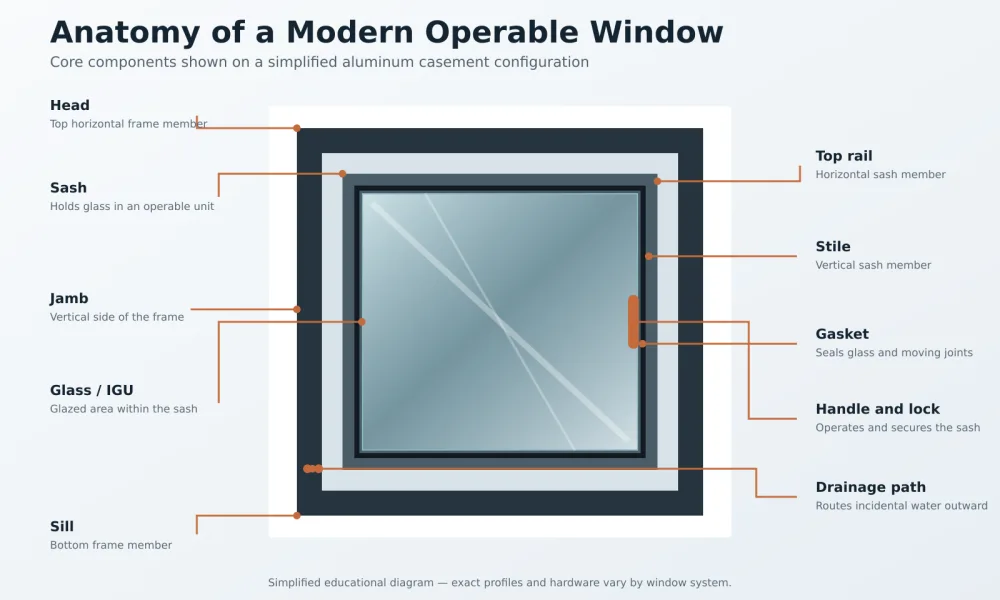
Operable aluminum window diagram labeling the frame, sash, glass, rails, stile, gasket, lock and drainage path.

Parts of a Window Frame

The frame is the stationary structure surrounding the sash or glass. It connects the window to the building opening but is different from the opening and decorative trim.

Head, Jambs and Sill

The head, jambs and sill form the perimeter of the frame.

  • Head: The horizontal member across the top.
  • Jambs: The vertical members on the left and right sides.
  • Sill: The horizontal member across the bottom.

The visible finish surrounding the frame is casing or trim, not the jamb. The sill is also different from the interior ledge, called the stool. Depending on its design, the sill can include slopes or channels that direct water outward.

Frame Profiles, Mullions and Thermal Breaks

Extruded aluminum profiles provide strength, glass support and interfaces for seals and hardware. Their geometry influences frame depth and visible glass area.

A mullion separates or joins adjacent window units. A muntin instead divides—or creates divisions within—the glazed area of a sash.

Because aluminum conducts heat, many systems place a lower-conductivity thermal break between the interior and exterior profiles. This reduces direct heat transfer through the metal. Our guide to thermally broken window and door systems examines the separator in detail.

Window Sash and Its Components

The sash holds the glass and moves in an operable window. It must remain aligned with the hinges, operator and perimeter seals.

Rails, Stiles and Glazing Stops

A sash generally includes horizontal and vertical members surrounding the glass.

  • Rails: The horizontal members at the top and bottom of the sash.
  • Stiles: The vertical members at each side.
  • Glazing stops or beads: Retaining profiles that help secure the glass within the sash or frame.

Check rails occur where the upper and lower sashes meet in hung windows. They are not used in casement, awning or direct-glazed fixed windows.

Muntins, Grilles and Screens

Traditional muntins separate individual lites within a sash. Modern grilles may instead be applied to the glass or installed inside an IGU to create a divided-light appearance.

An insect screen is optional. In an outward-opening casement or awning window, it is generally located on the interior side.

Window Glass and Glazing Components

Glass, pane and glazing are related but distinct terms. A pane—or lite—is an individual sheet; glazing can describe the installed glass or how it is secured.

Insulating Glass Units, Spacers and Edge Seals

An insulating glass unit, or IGU, uses two or more lites separated by a sealed space. A spacer maintains their distance, while edge seals enclose a cavity containing dry air or, when specified, insulating gas.

Desiccant within or near the spacer helps control residual moisture. Setting blocks support the glass, while gaskets, sealants and glazing beads cushion, seal or retain the IGU.

Pane thickness, coatings, spacer design, cavity width and gas fill influence performance; pane count alone does not determine the result.

Coatings and Glass Options

Clear glass provides daylight and views. Low-E coatings help manage radiant heat transfer, while tinted or reflective products modify solar heat gain, visible light and exterior appearance.

Tempered glass is heat treated and designed to break into relatively small pieces when fractured. Laminated glass contains an interlayer that helps retain fragments after breakage and may contribute to security or sound-control strategies.

The appropriate glazing specification depends on climate, orientation, opening size and project goals. Our Low-E and clear glass comparison examines these choices further.

Window Hardware and Operating Mechanisms

Hardware controls how an operable sash moves and locks. The required pieces depend on window type, sash dimensions and operation.

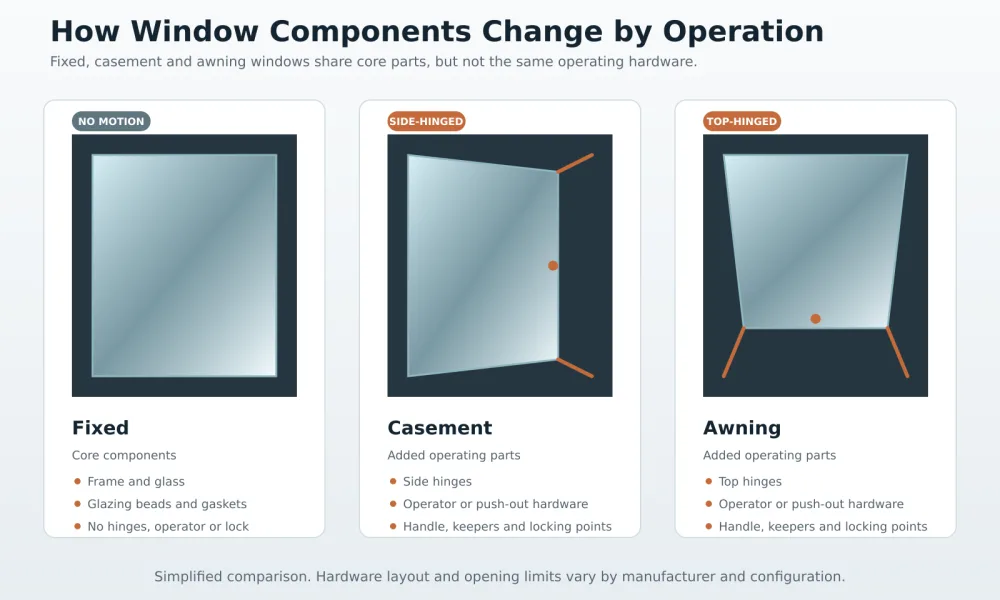
Casement Window Hardware

A casement window is side-hinged. Most U.S. residential versions open outward, although inward-opening configurations are available.

Components may include hinges, an operator or push-out mechanism, a handle, locking points and keepers. The operator controls movement; the locking hardware draws the sash against its seals.

Its applications and limitations are covered in our guide to casement windows.

Awning Window Hardware

An awning window is top-hinged and opens outward from the bottom. It may use friction stays, an operator or push-out hardware, a handle and locking points.

Hinge position changes how the sash moves and the shape of the clear opening. Our casement and awning comparison examines both configurations.

Fixed Window Components

A fixed window has no operator, hinges, operating handle or sash lock. It still requires a frame, glass support, glazing retainers, seals and components that connect the unit to the opening.


Comparison of fixed, casement and awning windows showing how hinges, operators, handles and locks vary by opening type.

Seals, Gaskets and Window Drainage Components

Some of the least visible parts of a window help control the joints where air or water could enter. Their effectiveness depends on correct fabrication, continuous contact and compatibility with adjacent materials.

Weatherstripping and Glazing Gaskets

Weatherstripping seals the joint between an operable sash and the stationary frame. When the window closes, the sash compresses or engages these seals to reduce unintended air and water movement.

Glazing gaskets are positioned around the glass, where they cushion or seal it against surrounding profiles. Some systems use wet-applied sealants or combine sealants with preformed gaskets.

Weep Holes and Drainage Paths

Many frames include internal drainage paths and exterior openings called weep holes. They direct incidental water from designated cavities toward the exterior. Drainage design varies by system and works with the frame geometry, glazing seals, sash seals and surrounding installation. Paint, sealant or construction debris should not obstruct intended drainage openings.

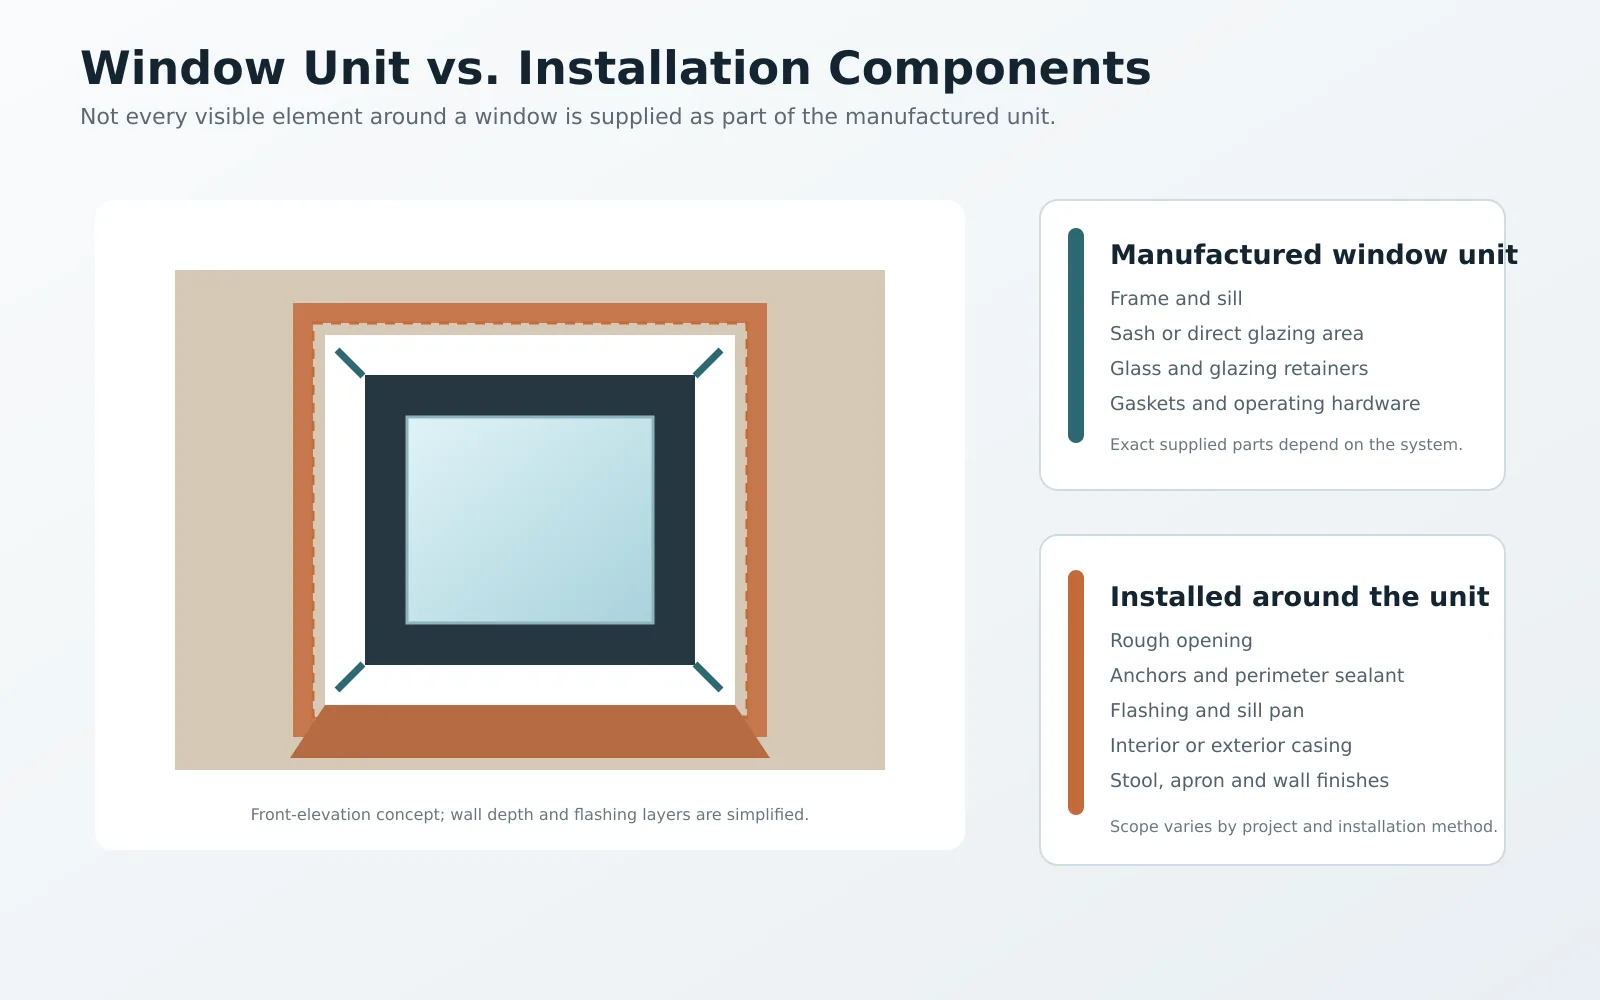
Parts Around a Window That Are Not Always Part of the Unit

Several familiar terms describe the opening or surrounding materials, not components of the manufactured unit. This distinction defines product and installation responsibilities.

Element

Location or function

Part of the manufactured window?

Casing or trim

Finishes the transition between the wall and window

Usually no

Stool

Interior horizontal ledge at the bottom

Usually no

Apron

Decorative trim below the stool

No

Jamb extension

Extends the finished depth toward the interior wall

Not always

Nailing fin or installation flange

Provides an attachment and flashing interface

Depends on the frame configuration

Flashing or sill pan

Manages water around or beneath the opening

Installation component

Perimeter sealant

Seals the joint between the frame and adjacent construction

Installation component

Rough opening

Opening formed in the wall to receive the window

Part of the building

Drawings and installation instructions should establish which components are supplied and which are completed in the field.


Diagram separating manufactured window parts from installation components such as anchors, sealant, flashing, sill pan and casing.

How Window Components Work Together

Performance cannot be assigned to one part in isolation. The components that matter depend on the objective being evaluated.

Performance area

Components or factors that may influence it

Structural stability

Frame, sash, glass support, anchors and opening dimensions

Thermal performance

Glass configuration, thermal break, spacers, gaskets and seals

Air and water resistance

Sash engagement, weatherstripping, glazing seals, sill and drainage paths

Ventilation

Window type, sash dimensions, hinges and operator

Security

Frame, glass, locking hardware, keepers and installation

Visible glass area

Frame, mullions and sash profile dimensions

For example, a thermally broken aluminum frame reduces conduction through the metal, but whole-window performance also depends on the IGU and sealed interfaces. Locking hardware can improve sash engagement, while security also depends on the glass and how the frame is anchored.

Frequently Asked Questions About Window Parts

These answers address common questions about window terminology.

What are the five main parts of a window?

A typical operable window has a frame, sash, glazing, hardware, and sealing or drainage components. Direct-glazed windows may omit the sash and hardware.

What are the sides of a window called?

The vertical sides of the frame are jambs. The finishing material around the frame is casing or trim.

What is the bottom part of a window called?

The bottom horizontal frame member is the sill. The interior ledge beneath the window may be called the stool, although it is commonly referred to as a windowsill.

What is the difference between a mullion and a muntin?

A mullion separates or joins adjacent window units. A traditional muntin separates individual lites within a sash, while a grille can create a divided-light appearance without separating the glass.

Identify the Window Type Before Selecting Its Components

Begin by determining whether the opening will be fixed or operable. That decision establishes whether the unit needs a movable sash, hinges, an operator, locking hardware and ventilation area. The frame, glazing and installation details can then be evaluated against the project’s structural, thermal and water-management requirements.

PRL’s Max Window System is available in fixed, casement and awning configurations for residential and commercial applications. Contact PRL Glass & Aluminum to discuss the frame, glass, hardware and performance requirements for your next project.

PRL fabricates and coordinates glass and aluminum components for storefronts, railings, folding systems, windows, custom doors, and architectural surfaces.

Glass and Aluminum Specialties Catalog: For Commercial and Residential Projects

Home / Archive by category "BLOG"

This catalog brings together PRL’s glass and aluminum specialty systems, applications, and lead times for commercial and residential projects. Architects, contractors, glazing professionals, and designers can review the available configurations in the full catalog. PRL confirms lead times based on the dimensions, finishes, material availability, and fabrication requirements of each order.

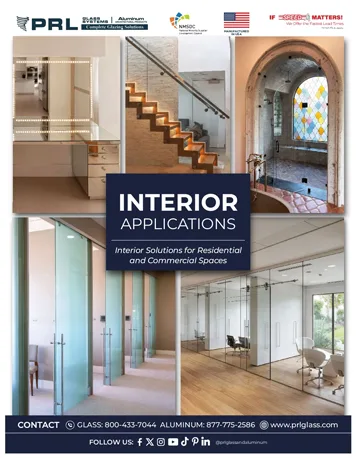
BROCHURE
INTERIOR APPLICATIONS
Interior solutions for residential and commercial spaces.
VIEW BROCHURE
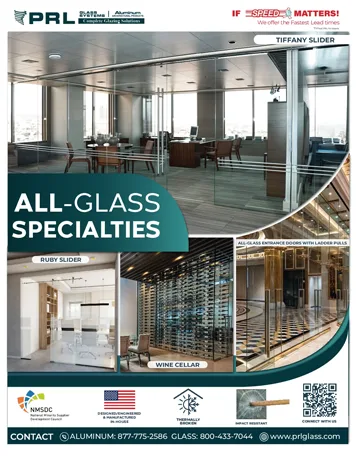
BROCHURE
ALL-GLASS SPECIALTIES
All glass specialties solutions by PRL glass & aluminum
VIEW BROCHURE
BROCHURE
ARCHITECTURAL
Complete solutions in aluminum and glass for every architectural project
VIEW BROCHURE

Find a PRL Product Category Based on Your Project Needs

The table identifies the PRL category that corresponds to each project need.

Project need

PRL category

Sliding doors, entrances, or glass enclosures

All-glass systems

Commercial entrance or movable glass wall

Entrance systems

Glass with color, texture, privacy, or specialized performance

Glass types and laminated glass

Railing for a staircase, balcony, deck, or terrace

Handrail systems

Custom mirrors, tables, or surfaces

Glass specialties

Folding doors, sliders, storefronts, or windows

Aluminum systems

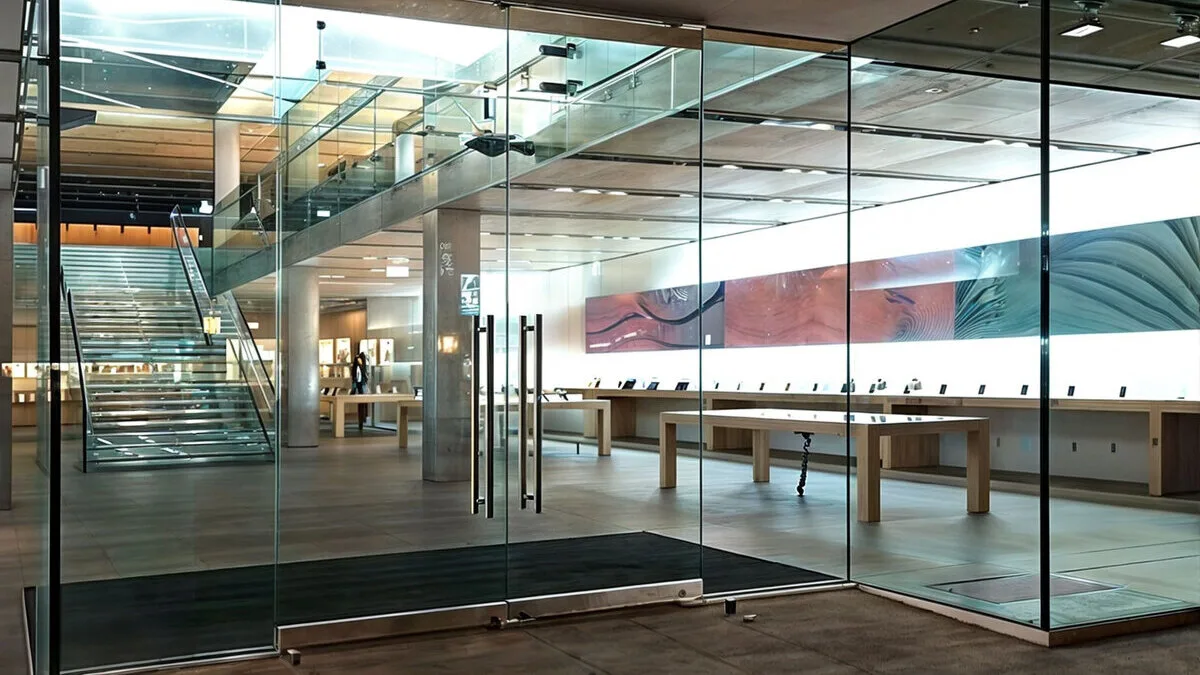
All-Glass Doors and Entrance Systems

This category covers sliders, movable walls, and entrance assemblies.

Sliding and Specialty Glass Applications

These systems save space and create flexible glass enclosures.

Tiffany Slider

When an opening does not provide clearance for the swing of a hinged door, Tiffany Slider moves one or two glass panels to the side. It uses 3/8-inch or 1/2-inch tempered glass and a top track mounted to the ceiling or installed with a fascia.

  • Lead time*: Contact PRL for details.

Ruby Slider

Ruby Slider divides interior spaces with minimal visible metal and no floor track. Its top track attaches to a wall or fixed glass panel and supports one or two panels of 3/8-inch or 1/2-inch tempered glass.

  • Lead time*: Contact PRL for details.

Wine Cellar

PRL fabricates custom glass doors and enclosures for wine cellars. The glass panels and doors are configured based on the dimensions and layout of the space.

  • Lead time*: Contact PRL for details.

Commercial Entrance Systems

These systems integrate glass doors with access or egress hardware.

All-Glass Entrance Doors With Ladder Pulls

These doors include ladder pulls, which are long handles available in different sizes and finishes. Some configurations also include a lock.

  • Lead time*: Contact PRL for details.

ClearVision Stackable Wall System

ClearVision temporarily divides a retail store, meeting room, or other commercial area with movable glass panels. When the partition is opened, the panels slide and stack to one side.

  • Lead time*: Contact PRL for details.

All-Glass Doors With Panic Device

PRL fabricates all-glass doors with panic hardware for commercial entrances that require reliable emergency egress. They are available with 1/2-inch, 5/8-inch, or 3/4-inch tempered or laminated glass. The glass thickness and composition are confirmed according to the door dimensions and configuration.

  • Lead time*: Contact PRL for details.

All-Glass Entrance Doors

PRL fabricates frameless glass entrances for commercial and residential buildings in standard or custom sizes based on the opening. Options include pull handles, automatic closing hardware, and preparation for access control.

  • Lead time*: Contact PRL for details.

Glass Types and Specialty Glass

This section groups decorative, laminated, performance, and custom glass.

Architectural and Decorative Glass

These products alter the color, opacity, texture, or appearance of glass.

Opaci-Coat Spandrel

Opaci-Coat Spandrel creates opaque areas in a facade to conceal floor slabs, columns, insulation, wiring, or HVAC equipment. It is available in different colors.

  • Lead time*: 5 to 7 days.

Textured Shower Glass

PRL offers textured glass for showers and bathroom enclosures. The patterns obscure the view into the shower while allowing light to pass through.

  • Lead time*: 2 to 3 days. Confirm the lead time with PRL for tempered configurations.

Tinted & Reflective Glass

Tinted glass adds color and changes the amount of visible light that passes through the panel. Reflective glass creates more pronounced exterior reflections, although its appearance changes with interior and exterior lighting conditions. Both are available as laminated glass, tempered glass, or insulated glass units.

  • Lead time*: Laminated glass, 5 days; tempered glass, next day; insulated glass, 3 to 4 days.

Mirrors

PRL fabricates custom mirrors for bathrooms, gyms, hotels, retail stores, and offices. They are available in clear, bronze, or gray glass, with polished or beveled edges, cutouts for lighting, and multi-piece configurations.

  • Lead time*: 2 days.

Custom Sandblast

PRL sandblasts logos, images, or patterns onto glass panels. A design can combine different tones with carved areas at different depths.

  • Lead time*: 5 to 7 days.

PRL’s all-glass systems include sliding doors, movable walls, and commercial entrances configured for the dimensions and hardware needs of each opening.

Laminated and Performance Glass

Laminated glass bonds two or more pieces of glass with an interlayer. Depending on the composition, the interlayer holds the glass together after breakage, adds color, or contributes to sound control.

Max Sliders With Sound Control

Max Slider is available with Sound Control Glass for homes and businesses exposed to traffic noise. The glass interlayer helps reduce sound transmission through the enclosure.

  • Lead time*: 2 to 3 weeks.

Rainbow Color Laminated Glass

Rainbow Color Laminated Glass incorporates color within the glass. Its 12 standard colors can be combined to create additional colors. The appearance changes with the glass type and lighting conditions, so the project team should review a sample.

  • Lead time*: 5 days.

Windbreak With SentryGlas®

SentryGlas® can be used in glass windbreaks for terraces, rooftops, and areas exposed to wind and moisture. Its interlayer helps the glass remain bonded after breakage. PRL must review the panel dimensions and attachment conditions.

  • Lead time*: 1 to 2 weeks.

Handrail System With PVB Laminated Glass

PRL fabricates railing systems with PVB laminated glass for staircases, balconies, and terraces. The interlayer retains the fragments if the glass breaks. The glass thickness and attachment method are defined for each system.

  • Lead time*: 7 days.

Bullet-Resistant Glass With Switch-It Privacy

This product combines ballistic protection and switchable privacy. It is available with UL 752 ratings from Level 1 through Level 8 and NIJ 0108.01 Levels IIIA, III, and IV. The glass, frame, anchors, and joints must correspond to the required rating and project dimensions. Switch-It changes the glass from transparent to opaque when activated by a switch.

  • Lead time*: 10 days; 15 days with Switch-It Privacy.

Custom Glass Pieces

These pieces are fabricated for the dimensions and details of each surface.

Counter Top With White Lami

This white laminated glass countertop is used in kitchens, bathrooms, bars, and service counters. PRL fabricates each countertop to the required dimensions and shape, including any openings or cutouts needed for the space.

  • Lead time*: 5 to 7 days.

Custom Table Tops

PRL fabricates custom glass tops for dining tables, desks, conference tables, and bars. The glass can protect a piece of furniture or serve as the primary surface. The design determines the shape, thickness, corners, and edge finish.

  • Lead time*: 5 to 7 days.

Glass Railing Systems

PRL fabricates railing systems with posts, side-mounted supports, or a base that leaves more of the glass visible. Gates are also available to provide access through the enclosed area.

System

Distinguishing element

Lead time*

Infinity Railing System

Modular aluminum railing system

3 to 4 weeks

Flex Post Railing System

Stainless steel posts

2 to 3 weeks

Elegante Railing System

Frameless glass with minimal visible supports

2 to 3 weeks

Gates

Access through the area enclosed by the railing or fence

1 to 2 weeks

PRL must confirm the supports, glass dimensions, attachment method, and applicable safety requirements before the system is selected.

Aluminum Doors, Windows, and Storefront Systems

This category combines operable systems, storefronts, doors, and windows.

Folding, Sliding, and Commercial Systems

These systems create wide openings, glazed corners, or commercial fronts.

Accordion Bifold

Accordion Bifold connects residential living and dining areas, restaurants, or hotel spaces with a patio or terrace. The glass and aluminum panels fold and stack at one side or split and stack at both ends of the opening.

  • Lead time*: 3 to 4 weeks.

Ultra Narrow Cladded Doors

Ultra Narrow Cladded Doors are designed for commercial entrances that call for narrow sightlines and metal-clad framing.

  • Lead time*: 2 to 3 weeks.

90° Max Slider Configuration

The 90° Max Slider Configuration places sliding panels along both sides of a corner. It is available with two or more panels to connect the interior of a home or business with a patio, terrace, or balcony.

  • Lead time*: 2 to 3 weeks.

Storefront

A storefront is a glass-and-aluminum wall system used at retail stores, restaurants, offices, and other commercial buildings. PRL offers coordinated packages that include frames, glass panels, doors, hardware, and finishes.

  • Lead time*: Complete system, 1 to 2 weeks; standard stock lengths, next day.

Aluminum Doors and Windows

These products provide operable or fixed openings for residential and commercial projects.

Aluminum Windows: Casement, Awning, and Fixed

PRL fabricates aluminum windows for residential and commercial projects. Casement units hinge at one side and open outward; awning units hinge at the top and open outward from the bottom; fixed units do not open. Available glazing includes insulated and impact-resistant glass.

  • Lead time*: 2 to 3 weeks.

Residential Sunny Lux Aluminum French Doors

Sunny Lux is an aluminum door for residential entrances and selected commercial applications. It is available in single- or double-door configurations with inswing or outswing operation. The door includes narrow frames, a four-point lock, and insulated glass; impact-resistant glass is optional.

  • Lead time*: 2 weeks.

Commercial Aluminum Battle Door

Battle Door pairs an aluminum door with impact-resistant glass for commercial entrances exposed to hurricanes or windborne debris. Its thermally broken frame reduces heat transfer through the aluminum. PRL has a configuration tested to ASTM E1996-17 and ASTM E1886-19; the project dimensions, swing direction, and glazing must be checked against the documentation for that tested configuration.

  • Lead time*: 2 weeks.

*Lead times are catalog references and must be confirmed when requesting a quote. The schedule depends on the configuration, dimensions, finishes, material availability, and fabrication requirements.

Request a Quote for Your Project

PRL fabricates glass and aluminum systems in-house and ships within the United States. Its Glass and Aluminum divisions can coordinate the doors, panels, frames, hardware, and other components required for the same project.

To request a quote, provide the following information:

  • Product or system of interest.
  • Drawings and dimensions.
  • Number of doors, windows, panels, or glass pieces.
  • Required glass type or performance.
  • Interior or exterior use.
  • Residential or commercial application.
  • Preferred finish.
  • Approximate project date.

Glass Division: 800-433-7044

Aluminum Division: 877-775-2586


Floor elevations, threshold details, drainage and structural support should be coordinated before fabrication—not after the surrounding construction is complete.

How Large Operable Glass Openings Transform Indoor-Outdoor Spaces

Home / Archive by category "BLOG"

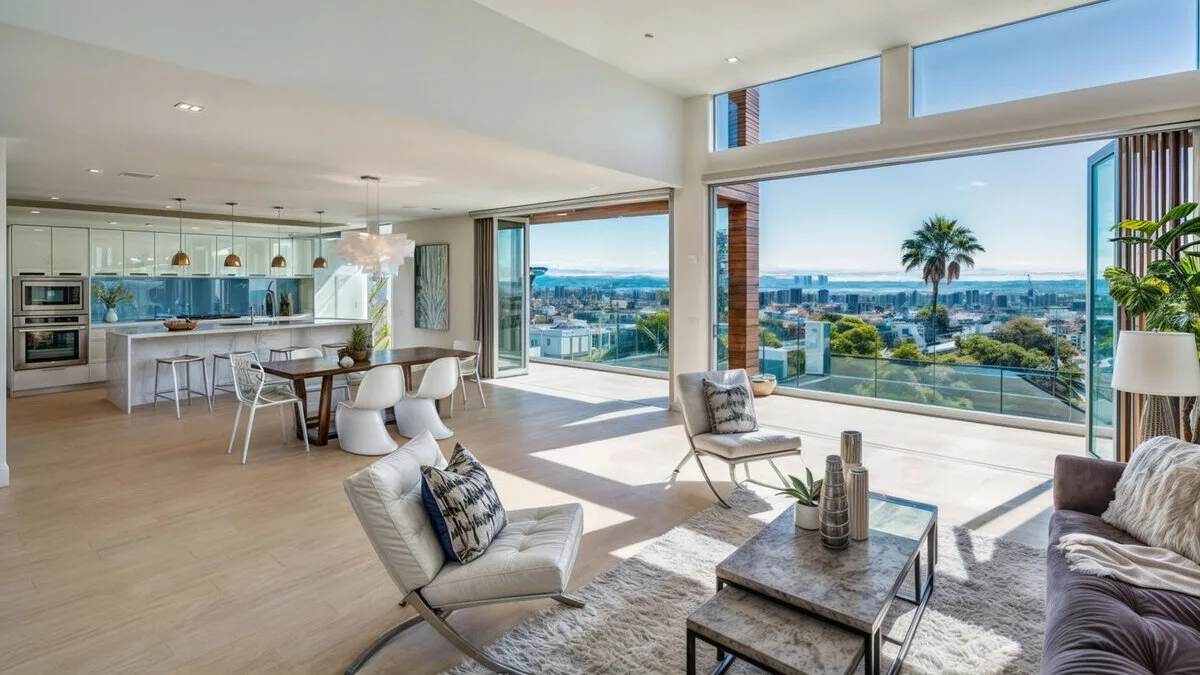
A kitchen may overlook a terrace, a living room may face a pool, and a restaurant may sit beside an outdoor dining area. Glass creates a visual connection between these spaces, but an operable opening changes how that connection works throughout the day. The glass affects how the interior looks, while the moving panels influence how people use it.

Here, large operable glass openings refer primarily to multi-panel sliding glass systems connecting interiors with patios, terraces and other exterior areas. When closed, they influence daylight, views and the perceived depth of a room. When open, they change how people move between adjoining areas and how those areas function together.

When closed, large glass panels preserve exterior views and bring daylight into the interior. When open, they also change ventilation and movement between adjoining areas

What Changes Before the Glass Panels Even Open?

Even with every panel closed, a large glass opening changes how a room feels. Instead of ending at a solid wall, the view continues toward a patio, garden, pool or surrounding landscape. This visual extension can make an interior feel less confined, particularly when the opening aligns with a seating area, kitchen or main walkway.

Its position within the floor plan matters. An opening facing an important exterior feature can frame that view, while poorly placed vertical profiles may interrupt it. Panel proportions and sightlines should therefore be considered as part of the room’s composition, not as details to resolve after the layout is complete.

Large glass areas can also bring daylight farther into a building. The result depends on orientation, exterior shading, nearby structures and glass selection. Daylight should not be confused with thermal performance: solar heat gain and heat transfer must be evaluated separately. When these factors are important, understanding the available types of Low-E glass can help the design team begin evaluating suitable glazing options.

What Changes When the Opening Is in Use?

Once the panels move, the boundary between the two areas can become a principal route through the space. People no longer rely on a conventional doorway, and activities can extend across a wider passage.

This does not create additional interior square footage. Instead, it provides a more practical way to use adjoining areas together. During a gathering, for example, occupants can move between interior seating and an exterior terrace without concentrating around a narrow entrance.

Natural ventilation is another possible effect. A wide opening allows outdoor air to enter across a larger area than a conventional door, although the actual airflow still depends on wind direction, the building layout and other openings within the space.

Furniture placement must support that movement. Seating, kitchen islands and service stations positioned too close to the threshold can create congestion even when the system provides a generous passage. The surrounding floor plan should anticipate how people will approach, cross and move away from the opening.

When the system is closed

When the system is open

Preserves exterior views

Connects adjoining activity areas

Brings daylight into the interior

Creates a broader route between spaces

Extends the perceived depth of the room

Introduces natural ventilation

Keeps interior and exterior conditions separated

Allows activities to extend across the threshold

Frames the surrounding landscape

Changes how people use the adjacent areas

The framed opening and the usable passage are not the same. Panel overlap, track configuration and storage position determine how much space remains clear.

Where the Panels Go Changes the Result

The effect of an operable glass opening depends partly on where the panels remain after they move. They may overlap along multiple tracks, collect near one side or travel into a designated wall pocket. Each arrangement changes how much of the view and passage remains unobstructed.

A wide framed opening does not necessarily provide an equally wide walking area. Panel overlap, framing and the selected layout all affect the usable passage. PRL’s guide to sliding glass door sizes and clear openings explains the difference between total unit width and the space people can actually walk through.

The panel destination also affects the adjoining room. Panels collected at one side may interrupt a preferred sightline, while a pocketed arrangement requires coordinated space within the wall. Before selecting a layout, the design team should know where the panels will travel and whether their final position will interfere with views, furniture or movement.

Where Does the Indoor-Outdoor Connection Have the Greatest Effect?

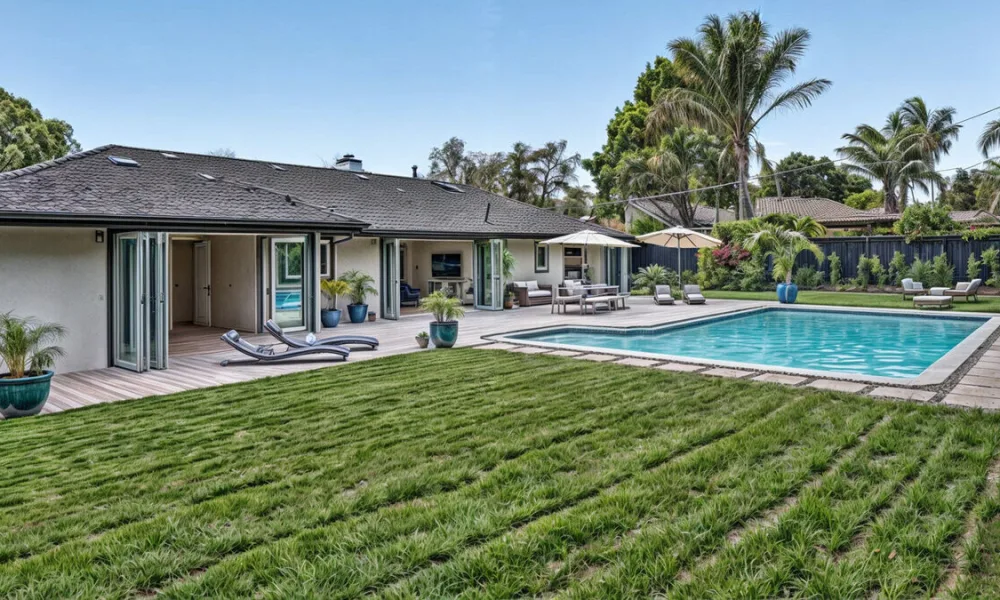
Large operable openings are most useful when the activities on both sides complement each other. Residential examples include living rooms facing pool terraces, dining rooms beside covered patios and kitchens connected to outdoor entertaining areas. In each case, the opening provides a direct route between spaces that already share a purpose.

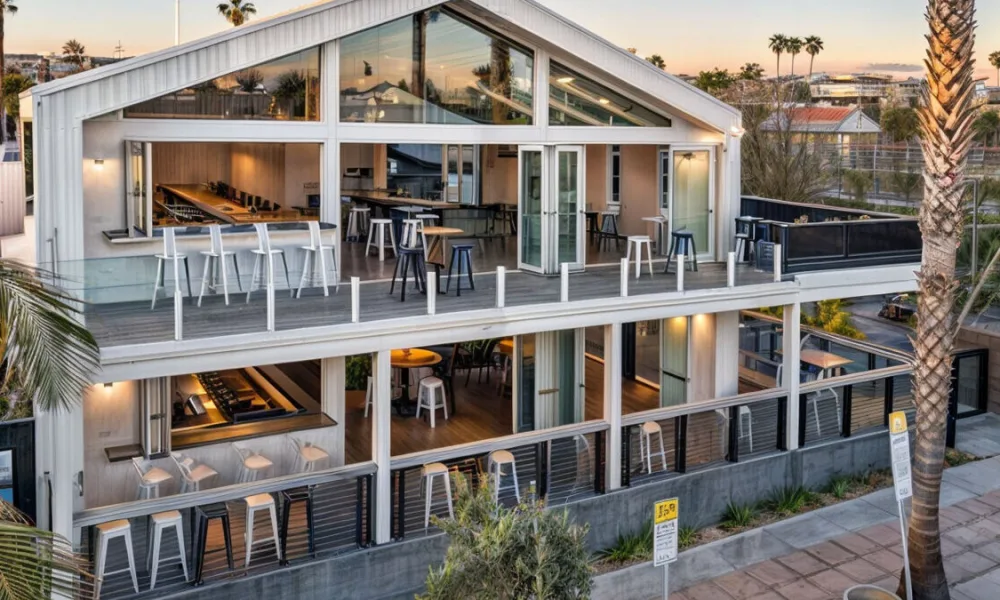
The same principle applies to restaurants, hotels, clubhouses and commercial gathering areas. A restaurant may adapt its seating according to the season, while a hospitality venue may open an event space toward a courtyard or terrace. The system supports changes in use and occupancy rather than serving only as a visual feature.

Flooring, exterior shading and furniture placement all influence the final experience. When these elements reinforce the same connection, moving from inside to outside feels like a natural extension of the space rather than an interruption.

Designing the Transition, Not Just the Opening

A successful indoor-outdoor connection requires coordination beyond the dimensions of the framed opening. Interior and exterior floor elevations influence how people cross the threshold, while sill and drainage details help manage water at that boundary.

The glass must also suit the location and intended use. Safety, post-break behavior, security and other project requirements may influence the glazing selection. Understanding the differences between laminated and tempered glass provides a useful starting point, although the complete assembly must be evaluated for the specific application.

Structural support and exposure conditions should be identified before fabrication. The architect and structural engineer must define the requirements around the opening, while the manufacturer confirms how the selected system, panel arrangement and glazing relate to those conditions. Exterior installations must also be reviewed according to the applicable wind, water and thermal requirements.

As the project moves closer to product selection, measurements, hardware, finishes, glass performance and delivery coordination become increasingly important. PRL’s sliding door planning checklist covers these later-stage decisions in greater detail.

From an Indoor-Outdoor Concept to a Sliding System

A successful operable glass opening should work in both positions. When closed, it should preserve the intended views and visual relationship with the exterior. When open, it should provide a useful passage without placing the panels where they interfere with movement or the surrounding space.

PRL’s Max Slider is a custom aluminum and glass sliding system for residential, commercial and hospitality projects requiring expansive openings and flexible panel arrangements. PRL can review the intended use, panel movement and project conditions before the final system is defined.


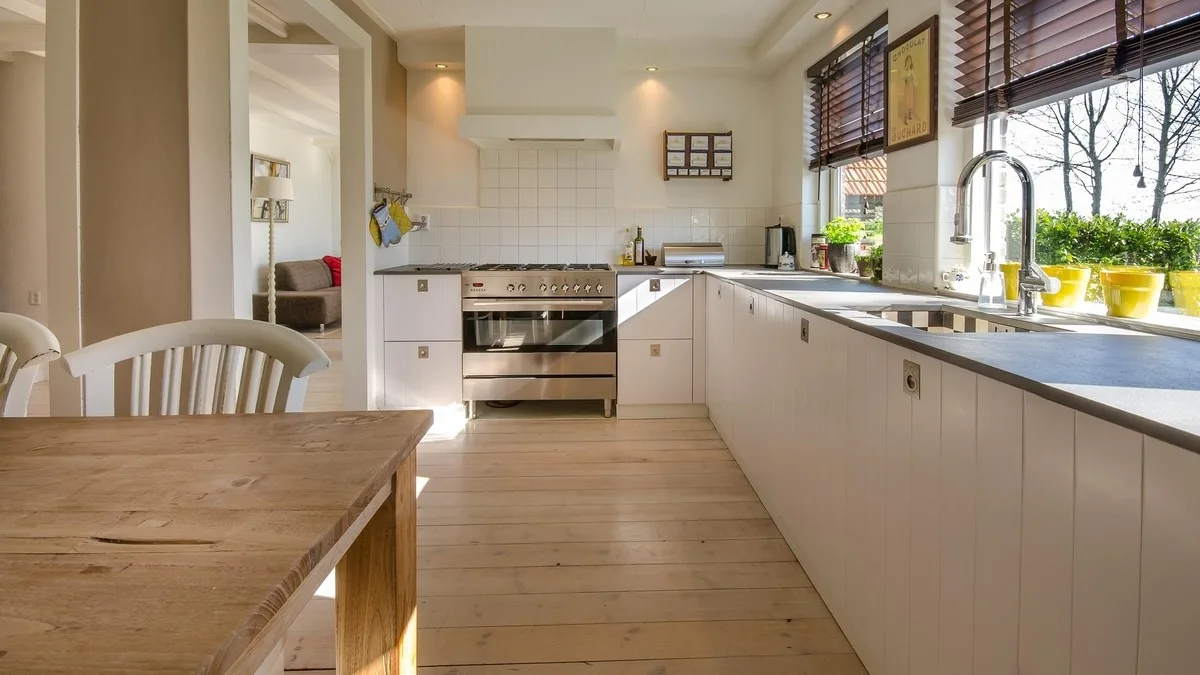
Pairing a picture window with an operable section brings daylight and ventilation into the kitchen while allowing the opening portion to sit where it is easiest to use

Best Types of Kitchen Windows: How to Choose for Your Space

Home / Archive by category "BLOG"

Casement and awning windows with accessible crank operators are often good choices above a kitchen sink. Sliding windows work well beside exterior walkways, while picture windows suit kitchens where the priority is views and daylight rather than ventilation through that opening. 

The best kitchen windows depend on the room’s layout and how you use it. A window beside a breakfast table serves a different purpose from one above a deep counter or a serving opening facing the patio. Start with that location, then compare the styles that fit. 

Crank-operated casement and awning windows can be convenient above a kitchen sink, provided both the operator and the lock remain within comfortable reach

Best Types of Kitchen Windows 

Each window style offers a different balance of ventilation, views, and usable space. This comparison can help narrow the options before you discuss dimensions and configurations with a supplier. 

Window type 

Where it works well 

What to consider 

Casement 

Above sinks and counters where ventilation matters 

The sash needs clear space outside 

Awning 

Horizontal openings and combinations with fixed glass 

Requires exterior clearance; opening angle affects airflow 

Sliding 

Kitchens beside walkways, decks, or outdoor seating 

Only part of a typical unit opens 

Picture 

Garden views and daylight in preparation or dining areas 

Does not provide ventilation 

Double-hung 

Accessible wall openings and traditional kitchen designs 

Lifting a sash can be awkward across a deep counter 

Garden 

A projecting shelf for herbs or small plants 

Exterior glass and side openings can be harder to reach 

Bay 

Breakfast areas with room for a larger window arrangement 

The projection requires coordination with the building and room layout 

Casement Windows 

Casement windows open outward on side hinges. Their broad opening can help bring fresh air into a kitchen, and a crank-operated model can be easier to use above a counter than a window with a sash that must be lifted. 

The main consideration is exterior clearance. An open sash should not obstruct a path or outdoor dining area. The hinge side should also suit any nearby corner, fence, or other obstruction. 

Awning Windows 

Awning windows are hinged at the top and open outward from the bottom. They can provide ventilation in a horizontal opening above a counter or sit alongside fixed glass in a larger arrangement. The projecting sash can offer some shelter during light rain, although wind-driven rain may still enter. 

When choosing between casement and awning windows, consider the opening’s proportions and the amount of ventilation you want. Also distinguish between crank-operated and push-out models: a push-out sash may require a longer reach to pull closed from behind a counter. 

Sliding Windows 

Sliding windows move horizontally without swinging into a walkway or patio. They are a useful option for kitchens facing narrow side yards or outdoor seating, where a projecting sash would get in the way. 

A typical two-panel slider opens only part of its total width because one sash overlaps the other. This matters when comparing ventilation or planning to pass food through the opening. The tracks also need regular cleaning to keep the sash moving smoothly. 

Picture Windows 

A picture window is fixed, making it a good option for framing a garden view above the counter or bringing daylight into a dining area. Pairing it with an operable section lets you place ventilation where it is easiest to access. For a large fixed pane, plan how the exterior glass will be cleaned, especially if a roof extension or another obstacle makes it difficult to reach. 

Double-Hung Windows 

Double-hung windows have two vertically moving sashes. They can maintain continuity with a home’s existing windows and work well beside a breakfast table or on another wall where you can stand close to the frame. 

They are less convenient across a deep countertop, where lifting the lower sash may require an awkward reach. Some models tilt inward for cleaning, but that feature needs enough room inside to use without interference from fixtures. 

Garden Windows 

Garden windows project beyond the wall to create a glazed shelf for herbs, plants, or small displays. The shelf provides space for greenery while leaving the main preparation surface clear. 

Choose plants suited to the sunlight and temperatures at that location. Any operable side sections and the projecting exterior glass should also be accessible for use and cleaning. 

Bay Windows 

Bay windows typically combine a center window with angled side units. They can bring views from several directions into a breakfast area and give that part of the kitchen a more open feel. 

A window seat or deeper interior ledge may be possible, depending on the design. Plan these features with the room dimensions and construction rather than assuming every bay window includes them.

Sliding windows keep open sashes out of walkways and patio seating areas. Casement and awning windows project outward, so exterior clearance should be considered when choosing a style.

How to Choose Windows for Your Kitchen Layout 

The same window can work well on an accessible wall and be awkward above a deep sink. Evaluate each option in relation to the counters, cabinets, fixtures, and outdoor space around it. 

Above the Kitchen Sink 

The operator and the lock should both be within comfortable reach. A convenient crank does not help if the latch is too high or too far to one side. If possible, try the hardware on a display unit and compare its position with the planned counter depth and window height. 

Include the faucet in that assessment. Even when the sash opens outward, a tall faucet can interfere with an interior handle or screen removal. The goal is to open, close, and lock the window without excessive stretching. 

Along Counters and Beneath Cabinets 

A horizontal window between the countertop and upper cabinets can bring daylight to a preparation area while retaining cabinets above. Its proportions should fit the space left by the backsplash, cabinet edges, and trim. 

Use standard window sizes as an early planning reference, then confirm the required dimensions with the supplier or installer. Along a wide counter, a combination of fixed and operable sections can keep the opening portion away from appliances or other obstructions. 

Facing a Patio or Outdoor Dining Area 

A kitchen pass-through window can make serving food and drinks outside more convenient. Sliding or folding configurations may suit this purpose, depending on the clear opening, panel arrangement, and screen options. 

Plan the interior counter and exterior serving surface together. A difference in height, a raised sill, or a track can affect how easily dishes move through the opening. Allow room for panels to slide or fold aside and for the screen to move out of the serving opening. 

Glass, Privacy, and Other Details to Consider 

Once the style and location are settled, the glass and frame choices will influence how comfortable the kitchen feels throughout the day. Review these details before ordering: 

  • Sun exposure: Direct sunlight may create glare on a preparation surface or make a dining spot uncomfortable. Discuss glazing and shading for that orientation. 
  • Privacy: If the kitchen faces a street or nearby home, decide where you want an outdoor view and where privacy matters more. Discuss suitable glass options or window coverings. 
  • Energy performance: Compare performance ratings for the complete window, including its frame and glass. Opening style alone does not establish how well it limits heat transfer or air leakage. 
  • Replacement conditions: When keeping an existing opening, confirm which styles can fit before finalizing the kitchen design. 

An open window can supplement kitchen ventilation, but it does not replace effective cooking exhaust. The EPA recommends using a range hood that vents outdoors whenever you cook, if one is available. Open windows when weather, outdoor air quality, and safety conditions permit. 

For kitchens suited to casement, awning, or fixed configurations, PRL’s Max Window System offers these options with thermally broken aluminum frames designed to accommodate insulating glass.

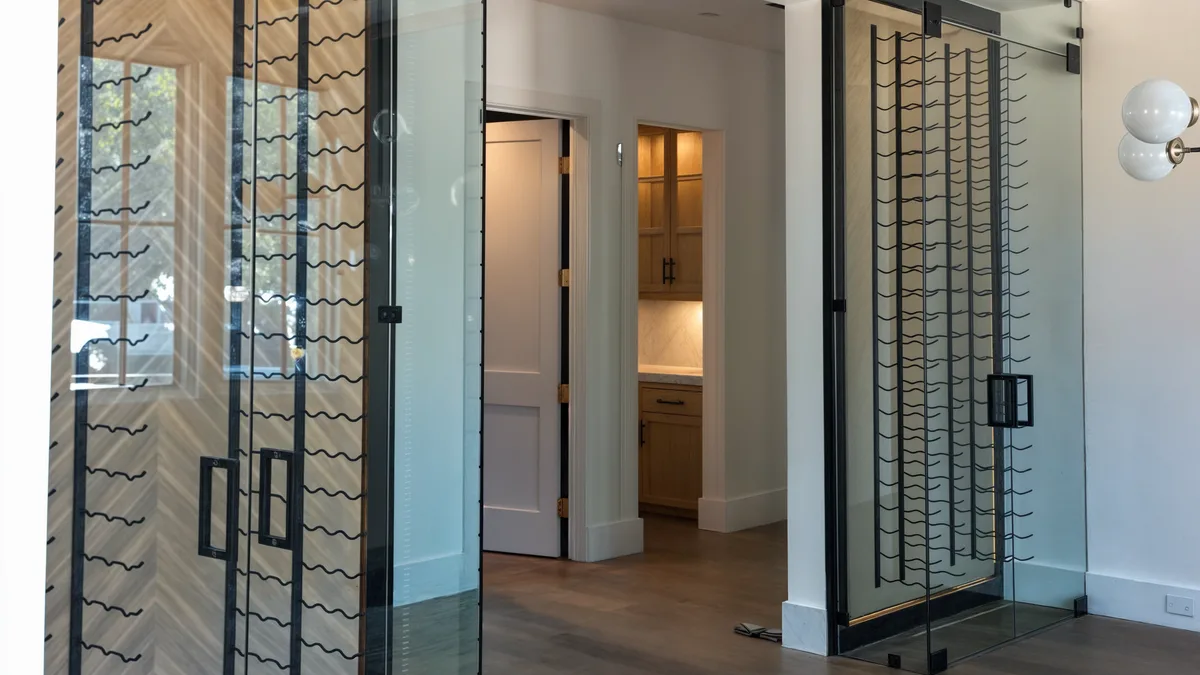
Before requesting a quote, defining dimensions, storage goals, visibility, rack preferences and climate-control needs can help clarify the wine cellar budget

How Much Does It Cost to Build a Wine Cellar? Main Factors to Consider

Home / Archive by category "BLOG"

There is no single cost to build a wine cellar because every project has a different scope. A compact home wine cellar, a glass-enclosed wine room, and a commercial wine cellar can require very different materials, systems, and installation details.

The main factors usually include location, size, bottle capacity, enclosure type, racks, lighting, doors, climate-control requirements, materials, customization, and installation conditions.

For homeowners, architects, builders, restaurants, hotels, and hospitality spaces, understanding these variables can make the quoting process clearer and help avoid missing important details early in the project.

Wine cellar cost is shaped by project scope, including size, location, bottle capacity, enclosure type, racks, lighting, doors and installation conditions.

Why Wine Cellar Costs Can Vary So Much

Wine cellar cost is shaped by what the space needs to do. Some projects are designed for compact storage. Others are built as visible architectural features, climate-conscious wine rooms, or commercial displays that support service and customer experience.

A simple rack area will not have the same scope as a glass wine cellar with panels, doors, aluminum framing, lighting, and custom measurements. A restaurant or hotel wine cellar may also require greater capacity, frequent access, and a layout that works with daily operations.

Several factors can influence the budget, including:

  • Size of the space
  • Bottle capacity
  • Location
  • Type of enclosure
  • Door system
  • Wine cellar racks
  • Lighting
  • Climate-control needs
  • Glass and aluminum components
  • Level of customization
  • Installation complexity

As the project becomes more specific, pricing individual parts is not enough. The cost should reflect how the entire wine cellar will work as a system.

Size and Location

Size is one of the first factors that affects wine cellar cost. A larger space may require more racks, more materials, additional lighting, and a more complex layout. However, a smaller project can also become more involved if it has unusual dimensions or requires custom components.

Location can also change the scope. A wine cellar built in a basement may have different requirements than one placed near a dining room, kitchen, hallway, staircase, or entertainment area.

If the cellar is visible from nearby rooms, finishes, lighting, glass, doors, and racks usually need closer coordination. Existing conditions can also affect the project. A remodel may require adapting to walls, floors, openings, or structural limitations that are already in place. New construction can offer more flexibility because the wine cellar can be planned earlier.

Before estimating cost, it is useful to define:

  • Approximate dimensions
  • Desired bottle capacity
  • Location in the property
  • Whether the space is new construction or a remodel
  • Whether the wine cellar will be visible or hidden
  • How often the collection will be accessed

These details help clarify what type of solution the project actually needs.

How Glass Enclosures, Doors and Aluminum Frames Affect Cost

Glass enclosures can affect the budget because they add panels, doors, hardware, framing, measurements, and installation details to the project.

A glass wine cellar may include glass panels, glass doors, aluminum frames, framed or frameless configurations, custom openings, and coordination with racks and lighting. Each of these elements can change the scope depending on the dimensions, finish, hardware, and level of customization required.

Aluminum frames can also influence the budget depending on the profile, finish, configuration, and how the enclosure connects to the surrounding space. A simple framed opening will not have the same requirements as a larger glass enclosure with multiple panels or a more specific door system.

The door system should also be considered early. Doors affect access, circulation, separation, and the way the wine cellar will be used. If the door conflicts with racks, walking paths, or service flow, the design may need to be adjusted.

Glass and aluminum should not be treated as final decorative details. They are part of the system that shapes the appearance, function, and scope of the project.

How Racks, Lighting and Layout Shape the Budget

Wine cellar racks determine capacity, organization, access, and how the collection will be displayed. A basic rack layout may be enough for a small home wine cellar, while a larger or more visible project may need floor-to-ceiling racks, wall-mounted systems, case storage, display rows, or a combination of rack styles.

The rack design can influence cost through material selection, bottle capacity, custom sizing, wall-mounted or freestanding systems, display orientation, and integration with glass or doors.

Lighting also affects the budget. A wine cellar may need functional lighting for access, accent lighting for display, or a combination of both. In visible wine cellars, lighting becomes part of the overall design and should be coordinated with racks, glass, and surrounding finishes.

The interior layout should also support circulation. A design that looks good on paper may become difficult to use if there is not enough space to reach bottles, open doors, or maintain the cellar.

Climate-Control Requirements and Storage Goals

Climate-control requirements can be one of the biggest differences between a simple wine display and a wine cellar designed for longer-term storage.

Some projects may need temperature and humidity management. Others may be designed for shorter-term display, service, or easier access. The storage goal should be defined early because it can influence the enclosure, doors, location, sealing, lighting, and coordination with other systems.

A glass wine cellar may require additional planning because the wine area is more connected to the room around it. The design should consider how glass, doors, lighting, and location work with the intended storage conditions.

PRL’s role in this type of project is focused on glass and aluminum components. These components should be coordinated with the broader environmental requirements of the wine cellar, especially when long-term storage or climate-control systems are part of the project.

A glass wine cellar can involve additional budget factors such as glass panels, aluminum frames, door systems, hardware and coordination with the layout

Custom Wine Cellar Cost Factors

Customization can influence wine cellar cost when the project requires more than a standard rack or basic storage layout.

Custom factors may include:

  • Unusual dimensions
  • Under-stair spaces
  • Specific glass configurations
  • Special door systems
  • Aluminum frame finishes
  • Rack layouts designed for a specific bottle capacity
  • High-visibility residential or commercial locations
  • Integration with existing architecture
  • Installation conditions in a remodel or new build

Custom work can affect cost because more details need to be coordinated. Measurements, materials, glass, doors, framing, racks, lighting, and installation all need to work together.

For visible wine cellars, customization can also help the final design feel more connected to the architecture instead of forcing the space to fit a standard product.

Home Wine Cellar Cost vs. Commercial Wine Cellar Cost

A home wine cellar and a commercial wine cellar may share some of the same components, but their budgets are often shaped by different priorities.

A home wine cellar is usually planned around lifestyle, collection size, available space, and interior design. It may be used occasionally during meals, gatherings, or private tastings. The project may prioritize integration with a dining room, kitchen, basement, hallway, or entertainment space.

A commercial wine cellar usually has different demands. Restaurants, hotels, wine bars, tasting rooms, and hospitality spaces may need frequent access, greater capacity, stronger visibility, and layouts that support service or customer experience.

The budget difference is not always about square footage. It is often about use. A commercial project may need more coordination around staff movement, inventory, durability, lighting, display value, and daily operations.

Cost Mistakes to Avoid When Planning a Wine Cellar

A wine cellar budget can become less accurate when important details are left out at the beginning. Some common mistakes include:

  • Budgeting Only for Racks: Wine cellar racks are important, but they are only one part of the project. Doors, glass, framing, lighting, climate-control needs, and installation can also affect the final cost.
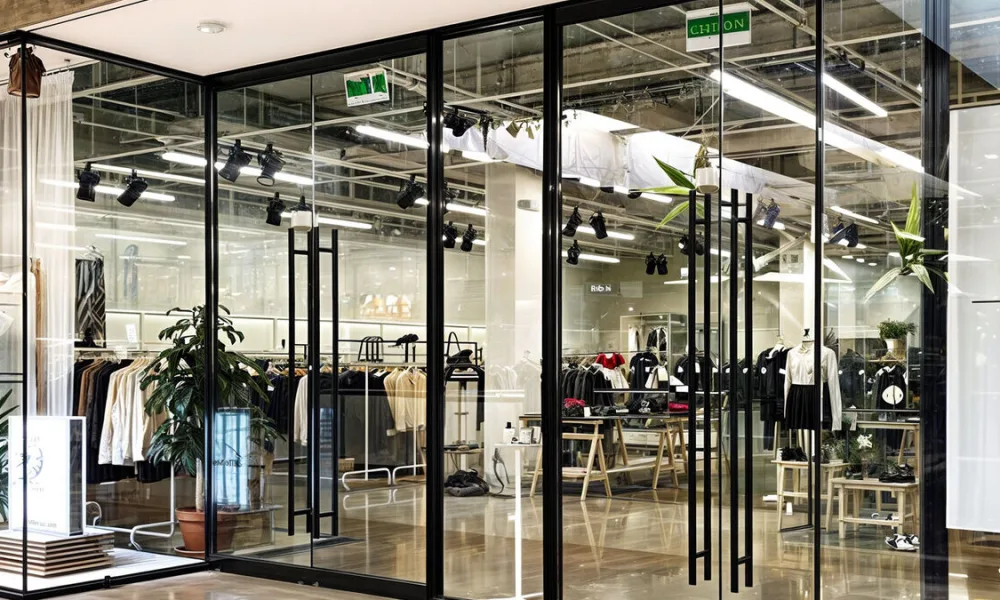
  • Leaving the Door or Enclosure for Later: The door and enclosure influence access, separation, visibility, and storage conditions. They should be included in the budget from the beginning.
  • Ignoring Lighting: Lighting can affect both appearance and function. In visible wine cellars, it should be planned with the racks, glass, and surrounding finishes.
  • Underestimating Installation Complexity: A project with unusual dimensions, existing walls, difficult access, or custom glass may require more installation planning than a simple storage area.
  • Not Defining Bottle Capacity: Without a clear idea of capacity, it is difficult to plan racks, layout, and the overall size of the wine cellar.
  • Choosing Glass Without Considering Location: Glass can be a strong design choice, but the location should be evaluated for light exposure, heat, access, and enclosure requirements.

What to Prepare Before Requesting a Wine Cellar Quote

A more accurate quote starts with clear project information. Before reaching out to a supplier or manufacturer, it helps to prepare the basic details of the wine cellar.

Useful information includes:

  • Project location
  • Approximate dimensions
  • Residential or commercial use
  • Desired bottle capacity
  • Whether the wine cellar should be visible or enclosed
  • Glass enclosure needs
  • Preferred door type
  • Desired frame or finish style
  • Rack style or storage preference
  • Lighting expectations
  • Climate-control requirements
  • Photos, plans, drawings, or measurements if available

This information helps define the scope and makes it easier to evaluate which components are needed.

It also helps avoid comparing incomplete estimates. Two wine cellar quotes may look very different if one includes glass, doors, framing, installation details, or custom components and the other does not.

The more clearly these details are defined, the easier it is to understand whether the project needs a simple enclosure, a glass wine cellar, or a more customized solution.

Planning a Wine Cellar Budget Around the Project

The cost of building a wine cellar depends on the complete project, not one isolated element. Size, location, racks, lighting, enclosure type, glass, aluminum frames, doors, climate-control needs, customization, and installation all shape the final scope.

For a simple home wine cellar, the budget may be driven mainly by racks, layout, and location. For a glass wine cellar, the enclosure, doors, framing, and visibility requirements may play a larger role. For a commercial wine cellar, access, durability, capacity, and service flow may become more important.

The best approach is to define how the wine cellar should function before trying to estimate what it should cost.

Share your wine cellar project details with PRL to explore glass and aluminum options that fit your space, design goals, and installation needs.