Loading

Archives July 2026

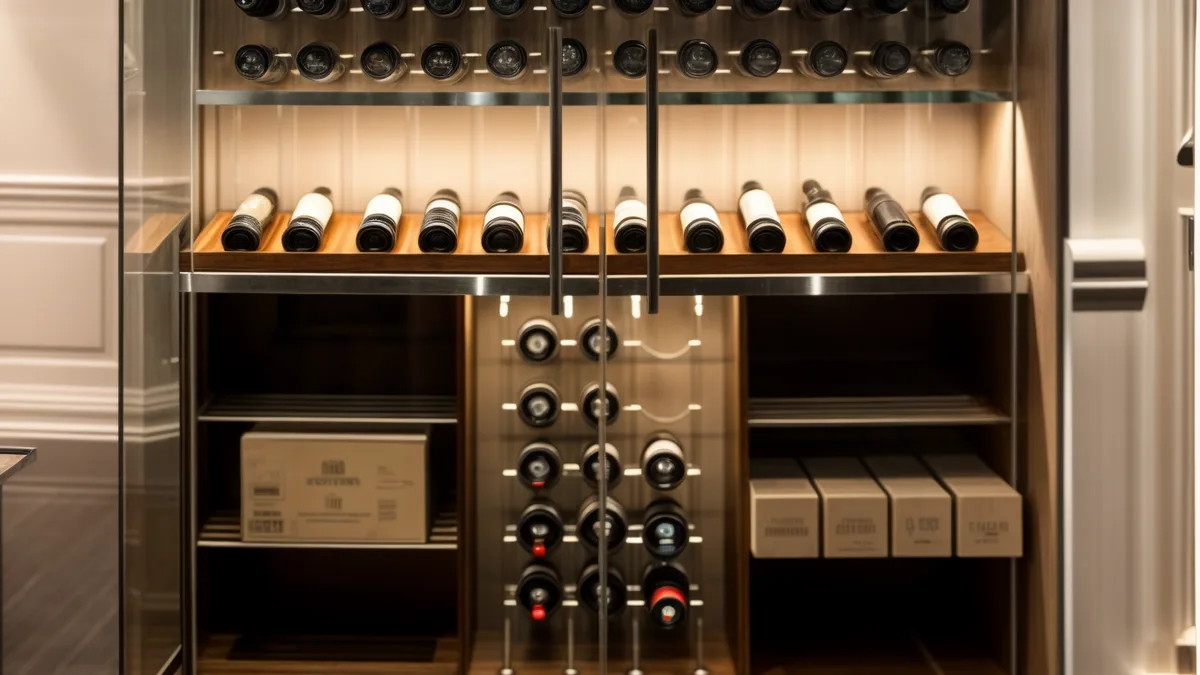
Small home wine cellars work best when bottle capacity, rack orientation, visibility and surrounding materials are considered before the space is built.

Home Wine Cellar Ideas for Modern Residential Spaces

Home / 2026 / July

A home wine cellar can be much more flexible than many homeowners expect. It does not always need a basement, a large room, or a hidden corner of the house. With the right planning, wine storage can become part of a dining room, kitchen, hallway, staircase area, entertainment space, or custom residential interior.

Some home wine cellars are discreet and practical. Others are designed to become a visible feature that adds character to the home. The best option depends on how the collection will be used, how much visibility is desired, and what the space can realistically support.

For modern residential projects, the goal is to make the collection easy to store, access, and display without making the wine cellar feel disconnected from the rest of the home.

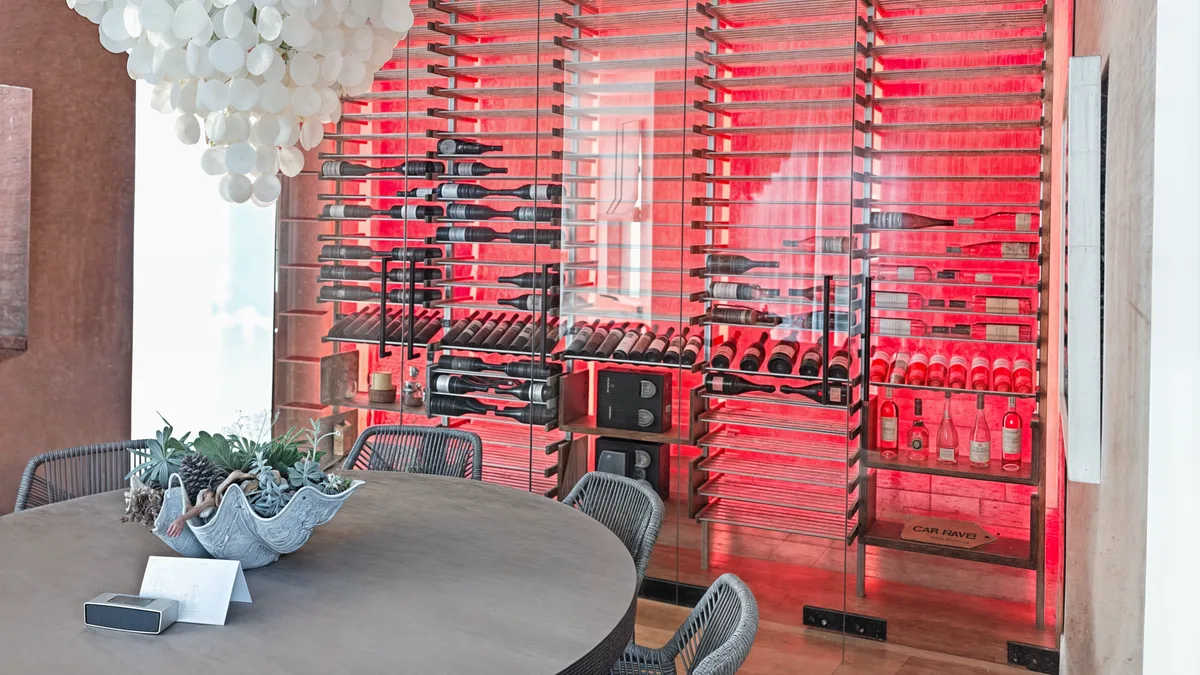
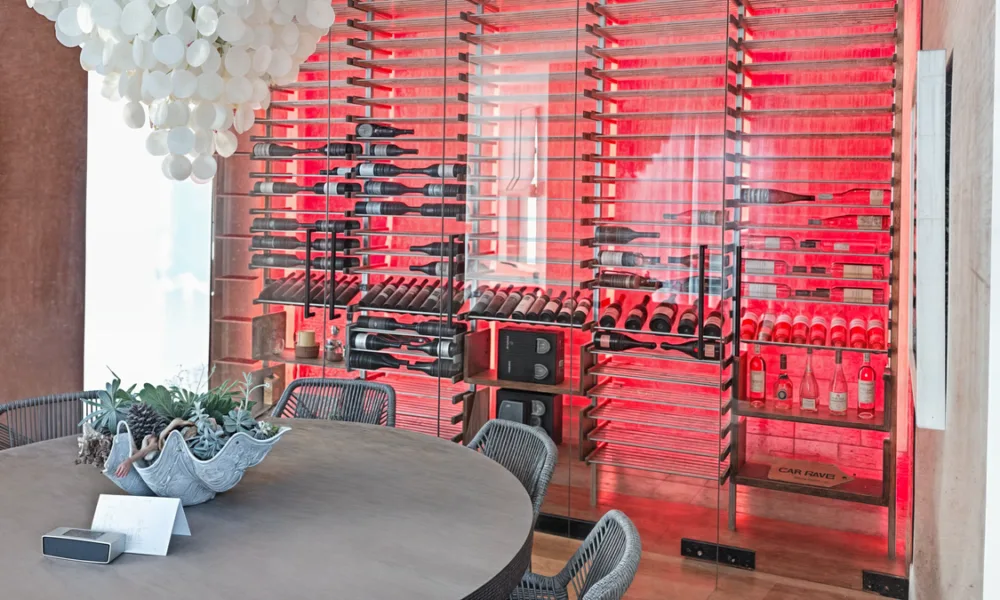
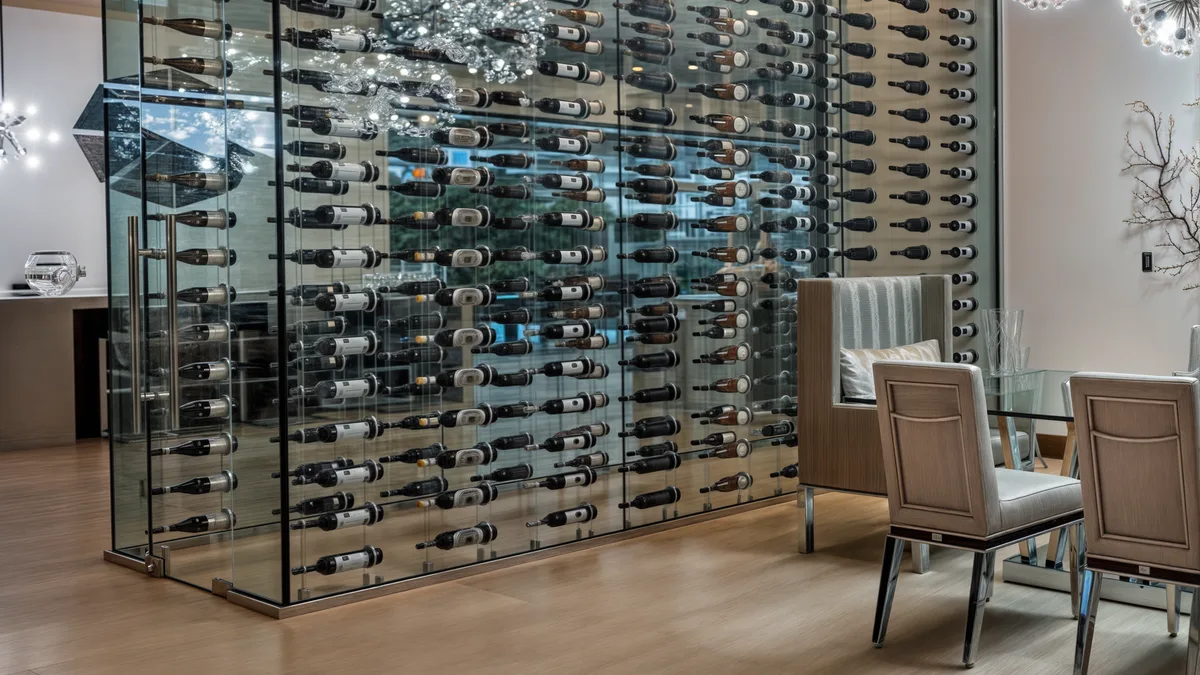
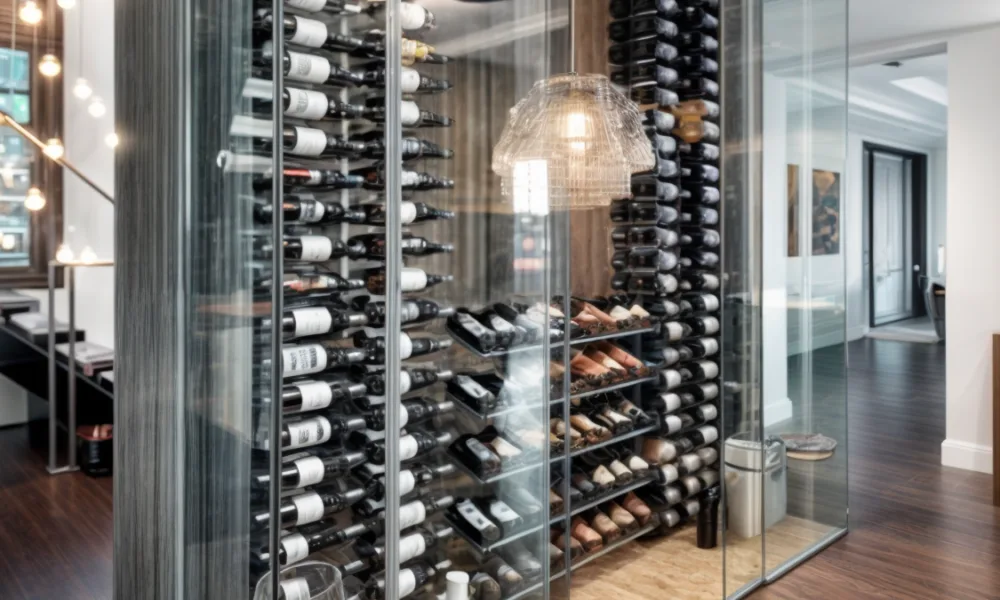
A home wine cellar can be integrated into dining rooms, stair areas, kitchens or entertainment spaces when layout, access, lighting and storage needs are planned together.

Where Can You Build a Home Wine Cellar?

The best place for a home wine cellar depends on how the space will be used and how visible the collection should be.

Common locations include:

  • Dining rooms
  • Kitchens
  • Hallways
  • Under-stair spaces
  • Living rooms
  • Entertainment rooms
  • Basements
  • Transitional areas between rooms

A homeowner who wants practical storage may prefer a more discreet location. Someone who sees the collection as part of the home’s design may choose a visible area near the dining room, kitchen, or social space.

The right location should make the wine easy to access without placing bottles in the warmest or brightest part of the home. Light exposure, heat, traffic, available depth, and enclosure needs should all be considered before the layout is defined.

Under-Stair Wine Cellar Ideas

The space under a staircase is often overlooked, but it can become one of the most attractive places for a compact home wine cellar.

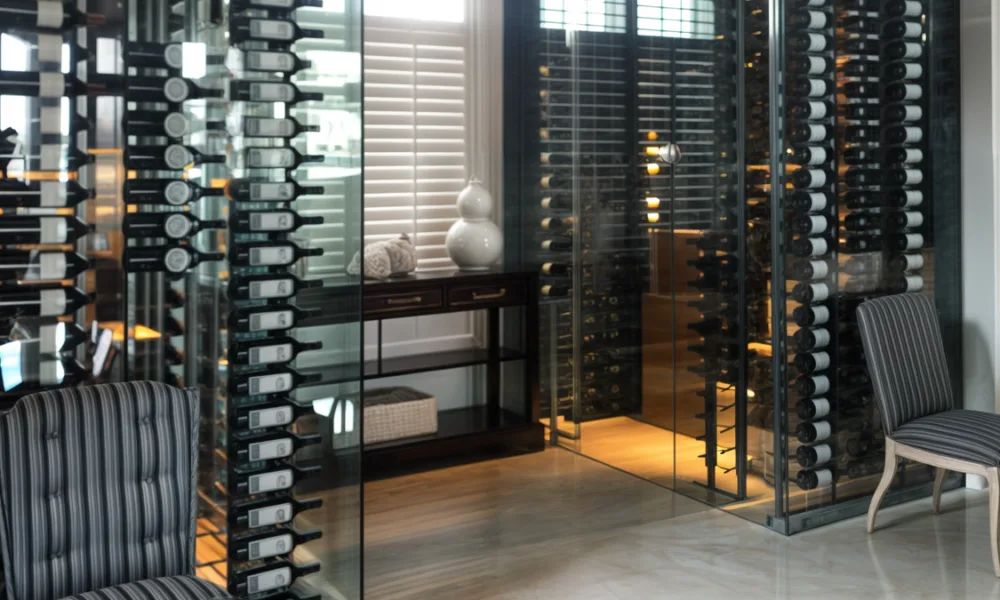
Because stair areas often have unusual angles and limited depth, the design has to work with the shape of the space instead of hiding it. Custom racks can follow the slope of the stairs, while glass panels or framed doors can help turn the area into a defined feature.

An under-stair wine cellar works well in entryways, open living areas, transitional spaces, or homes where there is no full room available for wine storage. It can create a strong visual moment without taking over the floor plan.

When planning this type of wine cellar, it is important to consider:

  • Available height and depth
  • Door access
  • Bottle capacity
  • Lighting placement
  • Rack layout
  • Exposure to sunlight or heat
  • Climate-control needs

Because these spaces are rarely standard, an under-stair wine cellar often benefits from a more tailored approach.

Dining Room Wine Cellars

A dining room is one of the most natural places for a home wine cellar. It keeps the collection close to where wine is served and allows the storage area to become part of the dining experience.

This can be done in different ways. Some homes use a full wine wall. Others include a glass-enclosed corner, a built-in display, or a smaller storage area near the table. In open-concept homes, a wine cellar can help define the dining area without closing it off completely.

Instead of being separated from the dining experience, the collection becomes part of it. The wine cellar adds depth to the room, supports entertaining, and gives the space a more intentional feel.

For dining room wine cellars, details such as door swing, lighting, rack orientation, and material finishes matter. The design should look refined, but it should also be practical enough for regular use.

Small Home Wine Cellar Ideas

A home wine cellar does not need to be large to feel valuable. Smaller spaces can work well when the layout is efficient and the materials are carefully selected.

Small home wine cellar ideas include:

  • Wall-based wine storage
  • Compact corner cellars
  • Under-counter wine storage areas
  • Vertical rack systems
  • Narrow glass-fronted displays
  • Small enclosed wine rooms
  • Built-in storage near dining or kitchen areas

In smaller homes, the challenge is not only capacity. The wine cellar also has to feel integrated instead of crowded. Clear glass, slim framing, vertical storage, and careful lighting can help the space feel lighter and more organized.

For compact projects, it is helpful to prioritize the bottles that need proper storage and separate them from bottles intended for short-term use. This keeps the design realistic and helps avoid overbuilding the space.

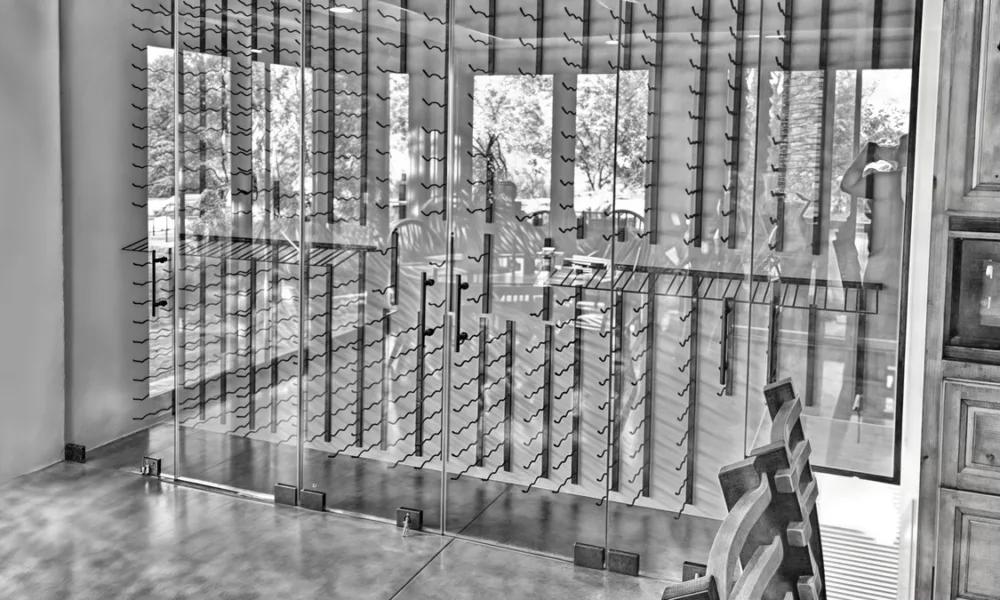
Glass and aluminum can help a residential wine cellar feel visually connected to the home while still defining the collection as a dedicated storage area.

Glass Wine Cellars for Open Interiors

Glass wine cellars work well in homes where the collection is meant to be visible from nearby rooms. They can define the wine storage area without making the surrounding space feel smaller or more closed off.

A glass enclosure beside a dining room, kitchen, or hallway can separate the wine area while keeping the view open. This is especially useful in contemporary homes where the design relies on visual continuity between spaces.

Glass can also make a smaller wine cellar feel more intentional. Instead of looking like an added storage corner, the collection becomes part of the interior.

For open interiors, glass works best when the enclosure, lighting, and location are planned together. The design should support visibility without ignoring the basic conditions needed for wine storage.

Contemporary Wine Cellar Designs with Glass and Aluminum

Contemporary wine cellar designs often use clean lines, simple forms, and materials that feel connected to the rest of the home. Glass and aluminum can support that look without making the space feel visually heavy.

Glass keeps the bottles, racks, and lighting visible. Aluminum can define the edges of the cellar through frames, doors, or enclosure details. Together, they can create a wine cellar that feels modern, structured, and refined.

This approach can work in several residential settings:

  • Minimalist dining rooms
  • Open kitchens
  • Luxury entertainment rooms
  • Transitional hallways
  • Modern basements
  • Under-stair areas
  • Custom residential wine rooms

In a contemporary home, the wine cellar should feel like it belongs to the architecture, not like a display added later. This is why materials, rack style, lighting, framing, and door design should be coordinated from the beginning.

Wine Cellar Racks That Work With Visible Spaces

Wine cellar racks play a major role in how a home wine cellar looks and functions. In a visible wine cellar, the rack system is seen from outside the enclosure, so spacing, symmetry, bottle orientation, and material finish matter more.

Some rack options include:

  • Floor-to-ceiling racks
  • Wall-mounted racks
  • Metal wine racks
  • Wood racks
  • Floating bottle displays
  • Case storage for larger collections
  • Mixed storage and display layouts

The right choice depends on the size of the collection, the available space, the desired level of visibility, and how often the bottles will be accessed.

In glass or open-view wine cellars, racks should be planned with viewing angles in mind. Bottles may be visible from the dining room, hallway, kitchen, or living area, so the layout should feel organized from both inside and outside the cellar.

When a Home Wine Cellar Should Be Custom

Some home wine cellars can be built with standard racks or simple storage systems. Others require a custom approach because of the space, design goals, or type of enclosure.

A custom home wine cellar may be useful when:

  • The space has unusual dimensions
  • The cellar is under a staircase
  • The homeowner wants a glass enclosure
  • The design needs a specific door system
  • The wine cellar must match a modern interior
  • The collection requires a specific capacity
  • The cellar is part of a larger remodel or new build

Customization can help align the wine cellar with the architecture instead of forcing the design to fit a standard product. It can also make the space more practical, especially when dimensions, access, racks, and visibility need to work together.

For residential wine cellar projects, PRL offers glass and aluminum solutions that help homeowners, designers, and builders create spaces that feel integrated, functional, and refined.

Low-iron glass can reduce the green tint of thick, multilayer glazing and provide a clearer, more color-neutral view of jewelry displays

The Glass Protecting a Jewelry Store Can Also Change How Its Products Look

Home / 2026 / July

A ring catching the light, the polished surface of a watch, or a necklace positioned inside a carefully illuminated display can be enough to make someone stop on the sidewalk. Before a customer enters the store, the glass has already influenced how the collection—and the business itself—is perceived.

In a jewelry store, that glass may also form part of the security strategy. Storefronts, entrances, and exposed display areas need to protect high-value merchandise without obscuring the products behind them.

This creates a challenge that is easy to overlook. Bullet-resistant glazing is generally thicker and more complex than conventional glass. As additional layers are introduced, the natural tint of the materials can become more visible. In a store where subtle differences in warmth, brilliance, and finish matter, the optical character of the protective glazing becomes part of the display design.

Why Thicker Glass Can Create a Greener View

Standard clear glass contains iron oxide, which gives it a slight green tint. The effect is often most noticeable along the edges and may go largely unnoticed in an ordinary window.

Jewelry displays create different viewing conditions. Products are seen from a short distance and under lighting selected to reveal small differences in color, reflection, and surface finish. A tint that seems insignificant elsewhere can become more apparent in front of a carefully arranged collection.

The thickness and composition of the glazing help explain why this happens. Bullet-resistant systems may combine multiple layers of glass, polycarbonate, acrylic, and specialized interlayers, depending on the required performance. Light must travel through the entire assembly before reaching the viewer.

As the amount of material increases, the natural green cast of standard glass may become more noticeable. This shift can subtly influence the perceived warmth of gold, the neutrality of white metals, and the appearance of clear or lightly colored stones. The final result also depends on the display lighting and the composition of the complete glazing assembly.

Low-Iron Glass Improves Clarity, Not Ballistic Performance

Low-iron glass contains less of the iron oxide responsible for the green tint in conventional glass. It offers higher visible light transmission and a more color-neutral view, particularly in thicker or multilayer configurations.

When used within bullet-resistant glazing, low-iron glass can help preserve the visual character of the products behind it. The benefit is optical: jewelry appears through a clearer substrate with less influence from the glass itself.

Low-iron glass does not make an installation bullet-resistant on its own. The required protection still depends on the complete system, including the number and composition of its layers, the interlayers, framing, anchoring, and the ballistic rating specified for the project.

Standards such as UL 752 evaluate bullet-resistant materials and assemblies under defined test conditions. The appropriate system should be selected according to the identified threat rather than assuming that every product described as “bulletproof” offers the same protection.

Bullet-resistant glazing is not indestructible. Depending on its composition and rating, it may crack, deform, or show visible damage during an impact while continuing to resist penetration and limit hazardous fragments under the conditions for which it was tested.

Bullet-resistant storefront glazing must balance security with optical clarity, lighting, framing, and unobstructed views of high-value merchandise.

Color Accuracy Depends on the Complete Assembly

Specifying low-iron glass can reduce the green cast, but it does not automatically guarantee a completely neutral result. Every transparent component through which the customer looks can influence the finished appearance.

Interlayers may have their own optical characteristics. Coatings can change visible light transmission or reflection. Mixing low-iron and standard clear glass within the same assembly may also reduce the expected improvement in color neutrality.

Display lighting adds another variable. Its temperature, intensity, position, and color-rendering performance can affect the appearance of metals and stones even before the glazing is considered. Reflections from the storefront or surrounding interior surfaces may further change what customers see.

For displays where color fidelity is especially important, the complete configuration should be reviewed together. A physical sample or visual mock-up under the store’s intended lighting can reveal differences that are difficult to anticipate from individual product specifications.

Storefront Security Still Has to Support the Display

Visibility is not simply an architectural preference in jewelry retail. The storefront is part of the merchandising strategy. It gives people a view of the collection, communicates the character of the store, and helps establish a sense of openness before they enter.

Reinforcing the exposed areas should not automatically make the entrance dark or visually restrictive. Properly specified glazing can preserve sightlines, light, and visual depth while providing the required level of resistance.

The framing also affects this balance. If oversized profiles cover part of the display or create a heavy border around the entrance, the products may become less visible from the sidewalk. A solution introduced late in the project can also look disconnected from the lighting, finishes, and proportions of the storefront.

Security and presentation therefore need to be considered together. The objective is not to conceal the store behind a barrier, but to reinforce vulnerable areas without weakening the visual connection between the merchandise and the customer.

Thicker Glazing Changes the Frame as Well

The optical quality of the glass is only one part of the finished result. The added thickness and weight of bullet-resistant glazing also influence the framing system required to support it.

An opening designed for conventional glass may not provide the necessary depth, edge engagement, or structural support for a heavier multilayer assembly. Trying to adapt the panel to an incompatible frame can affect both its appearance and its performance.

Planning the glazing and framing together gives designers greater control over profile dimensions, sightlines, door operation, and the relationship between the entrance and nearby displays. It also makes it easier to integrate pass-throughs, hardware, and access points without introducing visually disruptive additions later.

A customer may never notice the layers protecting the storefront—and that is partly the point. The system should reinforce the exposed area without adding a green cast, oversized framing, or unnecessary obstruction that changes the ring, watch, or necklace that first caught their attention.

Bullet-resistant glazing works best as part of a complete system that also accounts for frames, doors, pass-throughs, anchoring, and surrounding construction

The Most Vulnerable Part of a Currency Exchange May Not Be the Glass

Home / 2026 / July

A security camera captures someone approaching the counter. An alarm notifies a monitoring team. But neither one can prevent that person from forcing a poorly reinforced side door or attacking the frame around the service window.

Cameras and alarms remain essential in a currency exchange, where employees handle cash throughout the day and customers constantly enter and leave. Their role, however, is primarily to detect, document, and communicate an incident. Once an intrusion begins, the physical barriers surrounding the teller area determine how easily someone can reach the protected space.

That barrier involves more than the glass in front of the counter. A lightweight door, an improvised cash pass-through, or an inadequately anchored frame can create an opening beside an otherwise resistant panel.

Cameras Document the Incident, but They Do Not Form a Barrier

Surveillance cameras provide evidence and allow employees or remote teams to monitor activity throughout the location. Alarms can initiate a response by notifying authorities or security personnel.

These systems perform important functions, but they do not physically restrict access. A camera may show exactly how an intruder entered; it does not reinforce the door or service opening they used.

Traditional bars offer a visible separation between customers and tellers, but they are not necessarily designed to resist ballistic threats. They can also make the location feel restrictive—an important consideration for a business that still needs to appear professional and approachable from the street.

A more complete strategy assigns a specific function to each component. Cameras monitor, alarms communicate, protocols guide employees, and physical barriers help resist immediate access to sensitive areas.

Bullet-Resistant Does Not Mean Indestructible

Bullet-resistant glazing should not be understood as an impenetrable surface that eliminates every danger. It is designed and tested to resist defined ballistic threats under specific conditions.

Depending on its composition and rating, the glazing may crack, deform, or show visible damage while still resisting penetration and limiting hazardous fragments. Some systems combine glass, polycarbonate, and specialized interlayers to achieve the required performance.

Standards such as UL 752 classify bullet-resistant materials and assemblies according to specific firearms, ammunition, shot patterns, and test conditions. This allows architects, contractors, and business owners to select protection based on an identified threat rather than treating “bullet-resistant” as one universal category.

The objective is not to leave the barrier looking untouched after an impact. Its purpose is to remain effective against the threat covered by its rating and help delay access to the protected area.

Cameras and alarms detect and communicate an incident, while properly designed physical barriers help delay access to employees and cash-handling areas.

The First Failure May Happen Around the Glass

A teller window may use appropriately rated glazing and still leave employees exposed if the elements around it do not provide comparable protection.

During an attempted intrusion, the first vulnerable point may be:

  • A frame without adequate reinforcement or anchoring.
  • A side door intended only for basic access control.
  • A cash pass-through added without considering ballistic performance.
  • A communication opening that leaves a direct path through the barrier.
  • A connection between the frame and wall that was not designed for the expected load.
  • An employee entrance that bypasses the protected counter.

These details can receive less attention because they are not as visually prominent as the glass. Yet an intruder does not have to attack the strongest part of the installation. Any accessible weakness can become the preferred point of entry.

Frames, Doors, and Pass-Throughs Cannot Be Treated Separately

The protected area needs continuity. Glazing, framing, doors, hardware, pass-throughs, anchoring, and surrounding construction must be considered as parts of the same security system.

This does not mean that every surface in the location automatically requires the same ballistic rating. Protection should respond to the layout, expected threats, employee positions, public access, and the internal routes used to move cash.

A security assessment may identify the teller counter as the principal barrier while also revealing a secondary door or adjacent wall connection that requires reinforcement. Addressing those points during planning is usually more effective than adding isolated components after the location is already operating.

The installation also matters. A resistant panel cannot compensate for an incompatible frame or connections that do not follow the specifications of the tested system.

Protection Does Not Have to Make the Counter Feel Like a Cage

A currency exchange still depends on visibility and direct communication with customers. Reinforcing the teller area does not necessarily require blocking natural light or replacing the storefront with an opaque enclosure.

Bullet-resistant glazing can preserve sightlines between employees and customers, while properly designed aluminum framing and recessed pass-throughs can reduce the visual weight of the barrier. Controlled entrances can also be integrated into the layout instead of appearing as improvised additions.

The goal is not to conceal the business behind heavy-looking protection. It is to determine where separation is necessary and incorporate it without undermining the professional image of the location.

Cameras, alarms, and response protocols remain necessary, but they perform different jobs. When an intrusion begins, the physical barrier is the part of the security strategy already standing between the threat and employees. Its weakest door, opening, frame, or connection may ultimately matter as much as the glazing itself.

A well-planned wine cellar considers temperature stability, humidity, bottle capacity and daily use before defining racks, doors, lighting or enclosures.

Wine Cellar Design Guide: Key Elements for a Functional and Elegant Space

Home / 2026 / July

A well-planned wine cellar does more than keep bottles organized. It creates the right conditions for storage while giving the collection a defined place within the project.

For homeowners, architects, builders, restaurants, and hospitality spaces, planning a wine cellar involves more than selecting racks or setting aside a room. Temperature, humidity, light exposure, layout, doors, materials, and visibility all influence how the space performs.

The best results come when the wine cellar is considered early in the project, rather than added later as a decorative storage feature.

A modern wine cellar should balance storage conditions, rack layout, access, lighting and materials to protect the collection while integrating it into the space

What Is a Wine Cellar?

A wine cellar is a dedicated space designed to store wine under more stable conditions than a standard room, cabinet, pantry, or decorative rack. Its purpose is to help protect bottles from factors that can affect quality over time, including heat, light, dryness, vibration, and inconsistent storage conditions.

In traditional homes, wine cellars were often placed underground because lower-level spaces naturally offered cooler, darker, and more stable environments. Today, they can take many forms: enclosed rooms, compact residential spaces, visible wine displays, commercial wine rooms, or architectural features integrated into dining areas, kitchens, hallways, and hospitality interiors.

The difference is planning. A wine cellar is designed around the environment surrounding the bottle, not only the rack that holds it.

Why Wine Cellar Design Matters

Wine is sensitive to its surroundings. A space may look attractive, but if it ignores storage conditions, it may not perform well over time. At the same time, a purely functional cellar that overlooks layout and materials can feel disconnected from the rest of the property.

A strong design considers preservation, access, visibility, and the way the space will actually be used.

Before defining the layout, it helps to answer a few key questions:

  • Where should the wine cellar be located?
  • How many bottles should it hold?
  • Will the space be hidden, partially visible, or fully displayed?
  • What type of door or enclosure is needed?
  • How will temperature and humidity be managed?
  • What materials will support the design?
  • How will people access, view, and use the collection?

In residential and commercial projects, these decisions influence both performance and experience. A wine cellar in a dining room can become a visual focal point. In a restaurant or hotel, it can support the atmosphere and reinforce the value of the wine program. In a private home, it can give a collection a more intentional place within the interior design.

Key Elements Every Wine Cellar Should Consider

A functional wine cellar depends on several connected elements. None of them should be treated in isolation.

Temperature

Temperature is one of the most important factors in wine storage. Many wine storage guidelines place long-term storage around 55°F to 59°F, with stability being just as important as the exact number.

The main risk is not only that a space becomes too warm or too cold, but that the temperature changes frequently. Repeated fluctuations can affect the wine more than a steady, controlled environment.

For that reason, the design should consider location, sunlight exposure, enclosure type, doors, and whether a climate-control system will be needed.

Humidity

Humidity also plays a role, especially for bottles sealed with natural cork. If the environment is too dry, corks can shrink or dry out over time. If humidity is too high, the space may create issues with labels, finishes, or surrounding materials.

Many storage guidelines recommend relative humidity in the 55% to 75% range, although ideal conditions can vary depending on the type of cellar and storage goals.

For design purposes, the takeaway is simple: a wine cellar should not be planned like a regular decorative cabinet. It needs to support the environmental conditions required for proper storage.

Light Exposure

Direct sunlight and excessive artificial light can affect wine, especially when bottles are displayed for long periods. Ultraviolet exposure is one of the reasons lighting and placement should be planned carefully.

This does not mean that a wine cellar has to be dark or hidden. Soft, controlled lighting can highlight the collection, improve visibility, and create atmosphere. The goal is to choose lighting that supports the design without working against the storage conditions.

Wine Cellar Racks

Wine cellar racks determine more than bottle capacity. They affect organization, accessibility, airflow, visibility, and the overall look of the room.

A small home wine cellar may only need a compact rack layout. A larger residential or commercial wine cellar may require floor-to-ceiling storage, display rows, case storage, or a combination of different rack types.

When planning a racking system, it is important to consider:

  • Approximate bottle capacity.
  • Bottle sizes.
  • How often the collection will be accessed.
  • Whether bottles should be displayed or hidden.
  • How much walking space is needed.
  • How the racks interact with doors, glass, lighting, and walls.

The rack layout should support the way the wine cellar will actually be used, not only the number of bottles it can hold.

Doors and Enclosures

The door is one of the most important parts of a wine cellar because it affects access, visibility, and environmental separation.

A poorly planned door can make the space difficult to use or harder to control. A well-planned door can support the design while helping define the cellar as its own environment.

Depending on the project, a wine cellar may use a solid door, a glass door, a framed system, or a more open architectural enclosure. For visible wine cellars, glass and aluminum can help separate the space without making it feel disconnected from the surrounding room.

Layout and Access

A wine cellar should be easy to use. Layout issues often appear when the design focuses only on appearance or bottle count.

The layout should allow people to move comfortably, reach bottles, view labels, open doors, and maintain the space. In commercial projects, layout becomes even more important because staff may need frequent and efficient access during service.

A strong layout considers the relationship between racks, doors, lighting, walking paths, and the viewing angle from outside the cellar.

Glass and aluminum can help define a wine cellar as part of the architecture, allowing the collection to remain visible without disconnecting it from the room.

Wine Storage, Wine Display, or Architectural Wine Room?

Not every wine feature has the same purpose. A rack can support short-term organization, while a display may focus mainly on presentation. A wine cellar goes further by considering preservation, access, and the surrounding architecture.

An architectural wine room sits between storage and design. It protects and organizes the collection, but it also gives the wine a visible role within the space.

The right approach depends on the project. A compact home wine cellar may need an efficient layout and controlled access. A restaurant may need a visible wine room that supports service and customer experience. A residential entertainment area may benefit from a cellar that feels integrated with the rest of the interior.

Glass and Aluminum in Modern Wine Cellar Design

Modern wine cellars are no longer limited to hidden rooms or basement storage. In many projects, the collection is meant to be seen.

Glass can help make the wine cellar visible while still defining it as a separate area. This is especially useful when the cellar is located near a dining room, kitchen, hallway, or entertainment space.

Aluminum can support a clean and contemporary appearance through frames, doors, enclosure systems, and architectural details. When used carefully, it can help the wine cellar feel aligned with modern interiors without making the design feel heavy.

Glass and aluminum should be coordinated with the layout, access points, lighting, and environmental requirements of the space, rather than treated as separate finishing details.

Home Wine Cellar vs. Commercial Wine Cellar

A home wine cellar and a commercial wine cellar may share the same basic principles, but they usually serve different needs.

A home wine cellar is often designed around lifestyle, collection size, available space, and interior design. It may be used occasionally, during meals, gatherings, or private tastings.

A commercial wine cellar usually has to support visibility, service, inventory, customer experience, and frequent access. Restaurants, hotels, wine bars, and retail spaces often need wine cellars that are both functional and presentable.

The main difference is use. That distinction should influence the layout, door system, rack design, and material choices from the beginning.

Common Wine Cellar Design Mistakes

A wine cellar can lose functionality when key decisions are made too late in the process. Some of the most common mistakes include:

  • Treating the Cellar as Decoration Only: A wine cellar can be visually impressive, but it should not be planned only as a design feature. Temperature, humidity, access, lighting, and enclosure details still matter.
  • Choosing the Wrong Location: Some areas of a home or commercial space may receive more sunlight, heat, vibration, or traffic than others. The location should be evaluated before the design is finalized.
  • Planning Only for the Current Collection: Wine collections often grow. A layout that only fits the current number of bottles may become limiting sooner than expected.
  • Leaving Door and Access Details for Later: The door affects usability, visibility, and separation. It should be considered early, not added as a final detail.
  • Using Lighting Without a Storage Strategy: Lighting can improve the appearance of the wine cellar, but it should be selected carefully. Too much light or poorly placed lighting can work against the purpose of the space.
  • Selecting Materials Separately: Glass, aluminum, racks, flooring, lighting, and surrounding finishes should feel connected. When each element is selected separately, the final result can feel visually inconsistent.

When to Start Planning a Wine Cellar

The best time to plan a wine cellar is early in the design or remodeling process. This makes it easier to coordinate dimensions, access, enclosure type, lighting, materials, and environmental requirements.

For new construction, early planning allows the wine cellar to be integrated into the architecture from the beginning. For remodels, it helps identify what the existing space can realistically support.

Before starting, it is useful to define:

  • Where the wine cellar will be located.
  • Whether it will be visible or enclosed.
  • Approximate bottle capacity.
  • Type of rack system.
  • Preferred materials.
  • Door or enclosure needs.
  • Climate-control requirements.
  • Residential or commercial use.

These decisions make the next step clearer and help determine whether the project requires a simple storage area, a visible wine display, a glass wine cellar, or a more customized solution.

Building a Wine Cellar That Fits the Space

The strongest wine cellar projects are planned as part of the architecture, not added as a final storage feature. When layout, materials, access, and environmental needs are considered from the beginning, the result is easier to use, more consistent, and better aligned with the value of the collection.

For some projects, that may mean a compact home wine cellar with efficient racks. For others, it may mean a glass-enclosed wine room that becomes a central design feature. In commercial spaces, it may mean a visible wine cellar that supports both storage and customer experience.

Planning a wine cellar project? Explore PRL’s glass and aluminum solutions for modern wine cellar designs.

Damaged window sill with moisture marks and peeling paint, illustrating how recurring water leaks can affect drywall, trim, insulation, and the surrounding window assembly

Water Leaking From Your Window Frame? How to Find the Source and Stop It

Home / 2026 / July

A wet sill, stained trim, or water dripping from the top of a window frame can make it look like the window has failed. But the visible leak is not always the starting point.

Water may be entering through failed flashing, cracked sealant, blocked drainage, installation gaps, siding problems, or even forming indoors as condensation. Before adding more caulk or replacing the unit, it helps to trace the leak back to the point where water first gets in.

This guide explains why water leaks through window frames, how to narrow down the source, what you can do right away, and when replacement becomes the better option.

Close-up of a window frame with visible water stains on the trim and sill, showing how leaks can appear indoors even when the source starts around flashing, sealant, or exterior siding.

Why Water Gets Through a Window Frame in the First Place

When a window frame leaks, water is usually getting through either the window opening itself or the materials around it. Some causes are easy to spot from outside. Others stay hidden behind trim, siding, or drywall until stains or moisture appear indoors.

Failed Exterior Sealant

Exterior caulk seals the joints where the window frame, trim, siding, stucco, or exterior cladding meet. Over time, heat, UV exposure, rain, and temperature changes can make caulk crack, shrink, or pull away.

Once that joint opens, wind-driven rain can move around the frame and into the wall through gaps that may stay dry in lighter weather.

Poor or Damaged Flashing

Flashing is meant to direct water away from the window opening. If it is missing, damaged, poorly installed, or no longer bonded to the wall, water can get behind the exterior surface and show up inside near the frame.

A flashing issue is often more serious than a surface caulk problem because the water may be moving behind the visible materials. By the time moisture appears indoors, insulation, sheathing, trim, or drywall may already be wet.

Installation Gaps Behind the Frame

A window can be new and still leak if the installation was not properly sealed. Gaps behind the frame, poorly lapped flashing tape, missing sill protection, or weak integration with the house wrap can all leave paths for water.

In this case, caulking the visible edge may help for a short time, but it will not correct the hidden gap where water is entering.

Blocked Weep Holes

Many windows are designed with weep holes or drainage channels that let water escape from the frame. If dirt, debris, paint, insects, or sealant block those openings, water can build up and spill indoors.

This is often the cause when water pools along the lower frame or sill after rain. One important rule: do not seal weep holes. They are part of the window’s drainage system.

Rot, Warping, or Frame Movement

Wood trim and frame components can absorb moisture over time. As the material swells, softens, or rots, small gaps become larger and the leak gets worse.

This creates a cycle: water damages the frame, the damaged frame opens more space, and that space allows more water in. If the wood feels soft, paint is bubbling, or the trim looks swollen, the problem is no longer just a surface seal.

Problems Above the Window

Sometimes the window is not the original source of the leak. Water may enter through damaged siding, clogged gutters, roof runoff, cracks above the opening, or loose exterior trim. From there, it can travel down inside the wall and appear at the window frame.

That is why the area above the window matters as much as the frame itself.

Condensation That Looks Like a Leak

Not all moisture around a window comes from rain. Condensation can form when warm indoor air meets a cold glass surface or frame. It is common in cold weather, high-humidity rooms, or spaces with poor ventilation.

Condensation can leave water on the sill or frame, making it look like the window is leaking. The repair is different, so it is important to rule this out before focusing only on exterior work.

When the Leak Starts at the Top of the Window

Water leaking from the top of a window frame often points to a problem above the unit. The issue may be failed head flashing, a loose drip cap, cracked siding, open trim joints, or water traveling behind the wall surface.

The leak may not start exactly where the water appears indoors. Rain can enter higher on the exterior wall, move behind siding or trim, and then show up at the top of the interior frame. Wind makes this worse because it pushes water into seams that may not leak during a light shower.

A top-frame leak should not be ignored. Even a small amount of water can spread behind drywall, wet insulation, stain trim, or create conditions for mold if the source is not corrected.

Is It Really a Leak, or Just Condensation?

Before repairing the outside of the window, check whether the moisture is coming from rain or from indoor humidity. Condensation and window leaks can look similar, but they usually appear under different conditions.

It is more likely to be a true window leak if the water appears during or shortly after rain, gets worse during windy storms, comes from one specific point around the frame, or leaves stains on drywall and trim.

It may be condensation if moisture forms on the glass or interior frame during cold weather, appears even when it has not rained, or is worse in bathrooms, kitchens, laundry rooms, or poorly ventilated bedrooms.

A quick humidity check can help. If indoor humidity is high, improving ventilation, using exhaust fans, or running a dehumidifier may reduce the moisture. If the water only appears during rain, the source is more likely outside the window assembly.

Homeowner inspecting the exterior of a window after rain, checking cracked caulk, upper trim gaps, and drainage areas to identify where water may be entering the window opening.

What the Location of the Water Can Tell You

Where the water appears can help narrow down the cause. It will not always identify the exact entry point, but it can tell you where to look first.

  • Water at the Top of the Frame: If water appears at the top, start your inspection above the window, not only at the interior frame. Head flashing, drip caps, siding joints, or upper trim gaps are usually the first places to check.
  • Water Along the Sides: Side leaks may come from failed caulk, gaps between the frame and trim, poor flashing tape, or movement around the window opening. If the leak only happens during strong storms, wind may be forcing water through small exterior gaps.
  • Water Pooling at the Sill: Water at the sill may come from blocked weep holes, poor drainage, a failed lower seal, or condensation. If it appears after rain, check drainage paths and the exterior sill. If it appears on cold mornings, condensation may be the cause.
  • Moisture Between Glass Panes: Fog or water between panes usually means the insulated glass seal has failed. This is different from water leaking around the frame. In many cases, the glass unit or window may need to be replaced.
  • Leaks That Only Happen During Heavy Rain: Leaks that only appear during heavy rain or wind-driven storms can be harder to trace. The opening may be small, but wind pressure can push water behind siding, trim, or flashing. These leaks often require a careful exterior inspection rather than another quick layer of caulk.

How to Trace a Window Frame Leak Before You Repair It

Finding the source of a window leak takes patience because water can travel before it appears indoors. Start with the easiest clues and move outward.

  1. First, inspect the interior. Look for bubbling paint, soft drywall, swollen trim, musty smells, dark stains, or water marks around the frame. Note whether the moisture appears at the top, sides, sill, or corners.
  2. Next, check the exterior sealant and trim. Look for cracked caulk, open joints, loose trim, gaps around the frame, or areas where sealant has pulled away from the surface. Pay close attention to the upper corners and the head of the window.
  3. Then look above the window. Check siding, stucco, brick, gutters, roof edges, and exterior penetrations. Water may be entering above the opening and traveling down before it becomes visible inside.
  4. If the window has weep holes, make sure they are clear. Remove dirt or debris carefully and avoid blocking drainage paths with caulk or paint.
  5. A hose test can also help, but it should be done slowly. Start low and work upward in small sections while someone watches indoors. Do not spray the entire wall at once, and avoid high pressure. The goal is to recreate rain, not force water into places it would not normally go.
  6. Finally, pay attention to timing. A leak during rain points to exterior intrusion. Moisture on cold mornings may be condensation. Water after long storms may suggest saturated siding, poor flashing, or drainage problems above the window.

What You Can Do Right Away to Limit the Leak

Short-term fixes can limit the damage, but they should not become a routine after every storm. If the leak keeps returning, the source still needs to be corrected.

If you see small gaps in exterior sealant, remove loose material and re-caulk with an exterior-grade sealant on a clean, dry surface. Do not apply new caulk over wet, dirty, or rotted material.

Clear window tracks and weep holes so trapped water can drain. Check gutters and downspouts near the window, especially if water is overflowing onto the wall above the opening.

Inside, dry the area as soon as possible. Use fans or a dehumidifier if moisture has reached the sill, trim, or drywall. Take photos after each leak so you can track whether the problem is spreading.

Avoid the common mistake of sealing every visible opening. Some openings are designed for drainage. Blocking them can trap water inside the frame and make the leak worse.

Repairs That Actually Address the Source of the Leak

A lasting repair has to match the source of the leak. Caulk can help when the issue is a small exterior joint, but it will not solve every window leak.

If the sealant has failed, the old caulk should be removed and replaced with a continuous exterior-grade bead. The surface must be clean, dry, and stable for the seal to last.

If flashing is the problem, the repair may require removing trim or siding around the window to correct the water barrier. This is more involved than surface sealing, but it is often necessary when water is leaking from the top of the frame.

If drainage is blocked, the solution may be as simple as cleaning weep holes and tracks. If water damage has softened the trim or frame, the damaged material should be repaired or replaced before the opening is sealed again.

If the leak comes from installation gaps, the window may need to be partially removed and reinstalled correctly with proper flashing, sill protection, and sealing around the opening.

And if the window unit itself has failed, replacement may be the most reliable option.

When Repair Is No Longer Enough

A leaking window does not always need to be replaced. Minor sealant gaps, clogged drainage paths, or isolated exterior cracks may be repairable. But replacement becomes more likely when the window or frame can no longer manage water properly.

Consider replacement when the frame is soft, warped, rotted, or no longer sealing tightly. It may also be time to replace the window if water keeps coming back after proper repairs, if the sash no longer closes correctly, or if moisture appears between the glass panes.

Age matters too. Older windows may have worn seals, weaker frames, poor insulation, or repeated drafts. If a leak is happening alongside these issues, another patch may only delay the same problem.

Still, the source matters. If the water is entering through siding, flashing, gutters, or the wall above the opening, replacing the window alone may not stop the leak. The surrounding assembly has to be corrected too.

If the Window Needs Replacing, Consider Max Windows

If the leak is tied to a damaged, outdated, or poorly performing window, replacement can be the cleaner long-term solution. This is especially true when the frame has softened, the sash no longer seals, or moisture problems continue after targeted repairs.

In that case, Max Windows are worth considering as a long-term replacement option. Their durable construction and tighter fit can help reduce weak points where air and moisture often become a problem, while also supporting comfort and energy efficiency inside the home.

Even the best window needs proper flashing and installation to keep water moving away from the opening. When Max Windows are installed correctly, they can help restore a more reliable window system and reduce the need for repeated short-term repairs.

Start With the Source, Not the Caulk Gun

Water leaking from a window frame should not be ignored, even if it only appears during heavy rain. Small leaks can move behind trim, drywall, insulation, and framing before the damage becomes visible.

Before sealing or replacing anything, identify where the water starts. It may be failed caulk, poor flashing, blocked drainage, frame damage, condensation, or an issue above the window. Once you know the source, you can choose the repair that actually solves the problem.

The earlier you catch the source, the less likely the leak is to spread into drywall, trim, insulation, or mold repairs.