Loading

Water Leaking From Your Window Frame? How to Find the Source and Stop It

Home / BLOG / Water Leaking From Your Window Frame? How to Find the Source and Stop It

A wet sill, stained trim, or water dripping from the top of a window frame can make it look like the window has failed. But the visible leak is not always the starting point.

Water may be entering through failed flashing, cracked sealant, blocked drainage, installation gaps, siding problems, or even forming indoors as condensation. Before adding more caulk or replacing the unit, it helps to trace the leak back to the point where water first gets in.

This guide explains why water leaks through window frames, how to narrow down the source, what you can do right away, and when replacement becomes the better option.

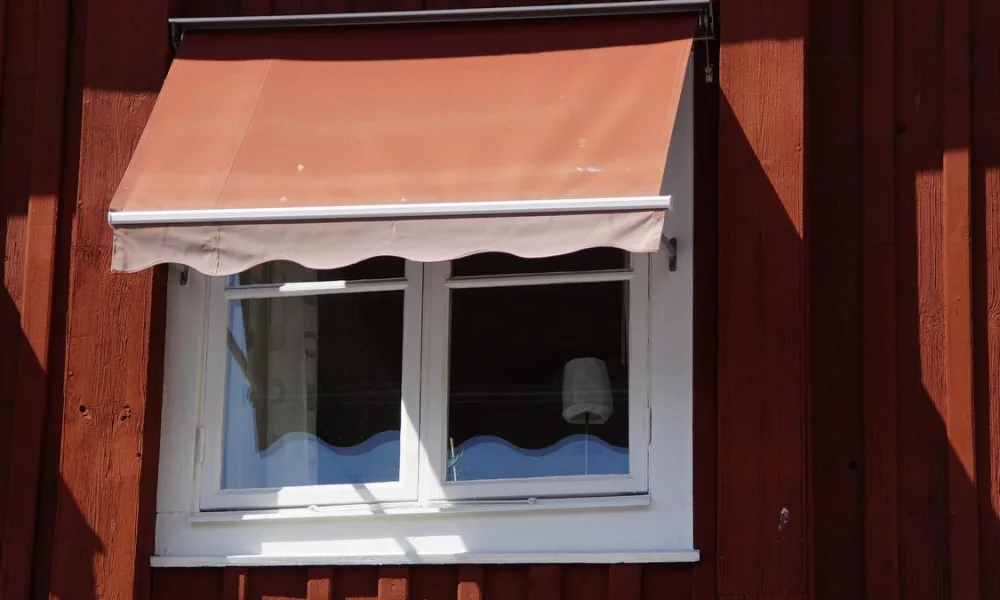
Close-up of a window frame with visible water stains on the trim and sill, showing how leaks can appear indoors even when the source starts around flashing, sealant, or exterior siding.

Why Water Gets Through a Window Frame in the First Place

When a window frame leaks, water is usually getting through either the window opening itself or the materials around it. Some causes are easy to spot from outside. Others stay hidden behind trim, siding, or drywall until stains or moisture appear indoors.

Failed Exterior Sealant

Exterior caulk seals the joints where the window frame, trim, siding, stucco, or exterior cladding meet. Over time, heat, UV exposure, rain, and temperature changes can make caulk crack, shrink, or pull away.

Once that joint opens, wind-driven rain can move around the frame and into the wall through gaps that may stay dry in lighter weather.

Poor or Damaged Flashing

Flashing is meant to direct water away from the window opening. If it is missing, damaged, poorly installed, or no longer bonded to the wall, water can get behind the exterior surface and show up inside near the frame.

A flashing issue is often more serious than a surface caulk problem because the water may be moving behind the visible materials. By the time moisture appears indoors, insulation, sheathing, trim, or drywall may already be wet.

Installation Gaps Behind the Frame

A window can be new and still leak if the installation was not properly sealed. Gaps behind the frame, poorly lapped flashing tape, missing sill protection, or weak integration with the house wrap can all leave paths for water.

In this case, caulking the visible edge may help for a short time, but it will not correct the hidden gap where water is entering.

Blocked Weep Holes

Many windows are designed with weep holes or drainage channels that let water escape from the frame. If dirt, debris, paint, insects, or sealant block those openings, water can build up and spill indoors.

This is often the cause when water pools along the lower frame or sill after rain. One important rule: do not seal weep holes. They are part of the window’s drainage system.

Rot, Warping, or Frame Movement

Wood trim and frame components can absorb moisture over time. As the material swells, softens, or rots, small gaps become larger and the leak gets worse.

This creates a cycle: water damages the frame, the damaged frame opens more space, and that space allows more water in. If the wood feels soft, paint is bubbling, or the trim looks swollen, the problem is no longer just a surface seal.

Problems Above the Window

Sometimes the window is not the original source of the leak. Water may enter through damaged siding, clogged gutters, roof runoff, cracks above the opening, or loose exterior trim. From there, it can travel down inside the wall and appear at the window frame.

That is why the area above the window matters as much as the frame itself.

Condensation That Looks Like a Leak

Not all moisture around a window comes from rain. Condensation can form when warm indoor air meets a cold glass surface or frame. It is common in cold weather, high-humidity rooms, or spaces with poor ventilation.

Condensation can leave water on the sill or frame, making it look like the window is leaking. The repair is different, so it is important to rule this out before focusing only on exterior work.

When the Leak Starts at the Top of the Window

Water leaking from the top of a window frame often points to a problem above the unit. The issue may be failed head flashing, a loose drip cap, cracked siding, open trim joints, or water traveling behind the wall surface.

The leak may not start exactly where the water appears indoors. Rain can enter higher on the exterior wall, move behind siding or trim, and then show up at the top of the interior frame. Wind makes this worse because it pushes water into seams that may not leak during a light shower.

A top-frame leak should not be ignored. Even a small amount of water can spread behind drywall, wet insulation, stain trim, or create conditions for mold if the source is not corrected.

Is It Really a Leak, or Just Condensation?

Before repairing the outside of the window, check whether the moisture is coming from rain or from indoor humidity. Condensation and window leaks can look similar, but they usually appear under different conditions.

It is more likely to be a true window leak if the water appears during or shortly after rain, gets worse during windy storms, comes from one specific point around the frame, or leaves stains on drywall and trim.

It may be condensation if moisture forms on the glass or interior frame during cold weather, appears even when it has not rained, or is worse in bathrooms, kitchens, laundry rooms, or poorly ventilated bedrooms.

A quick humidity check can help. If indoor humidity is high, improving ventilation, using exhaust fans, or running a dehumidifier may reduce the moisture. If the water only appears during rain, the source is more likely outside the window assembly.

Homeowner inspecting the exterior of a window after rain, checking cracked caulk, upper trim gaps, and drainage areas to identify where water may be entering the window opening.

What the Location of the Water Can Tell You

Where the water appears can help narrow down the cause. It will not always identify the exact entry point, but it can tell you where to look first.

  • Water at the Top of the Frame: If water appears at the top, start your inspection above the window, not only at the interior frame. Head flashing, drip caps, siding joints, or upper trim gaps are usually the first places to check.
  • Water Along the Sides: Side leaks may come from failed caulk, gaps between the frame and trim, poor flashing tape, or movement around the window opening. If the leak only happens during strong storms, wind may be forcing water through small exterior gaps.
  • Water Pooling at the Sill: Water at the sill may come from blocked weep holes, poor drainage, a failed lower seal, or condensation. If it appears after rain, check drainage paths and the exterior sill. If it appears on cold mornings, condensation may be the cause.
  • Moisture Between Glass Panes: Fog or water between panes usually means the insulated glass seal has failed. This is different from water leaking around the frame. In many cases, the glass unit or window may need to be replaced.
  • Leaks That Only Happen During Heavy Rain: Leaks that only appear during heavy rain or wind-driven storms can be harder to trace. The opening may be small, but wind pressure can push water behind siding, trim, or flashing. These leaks often require a careful exterior inspection rather than another quick layer of caulk.

How to Trace a Window Frame Leak Before You Repair It

Finding the source of a window leak takes patience because water can travel before it appears indoors. Start with the easiest clues and move outward.

  1. First, inspect the interior. Look for bubbling paint, soft drywall, swollen trim, musty smells, dark stains, or water marks around the frame. Note whether the moisture appears at the top, sides, sill, or corners.
  2. Next, check the exterior sealant and trim. Look for cracked caulk, open joints, loose trim, gaps around the frame, or areas where sealant has pulled away from the surface. Pay close attention to the upper corners and the head of the window.
  3. Then look above the window. Check siding, stucco, brick, gutters, roof edges, and exterior penetrations. Water may be entering above the opening and traveling down before it becomes visible inside.
  4. If the window has weep holes, make sure they are clear. Remove dirt or debris carefully and avoid blocking drainage paths with caulk or paint.
  5. A hose test can also help, but it should be done slowly. Start low and work upward in small sections while someone watches indoors. Do not spray the entire wall at once, and avoid high pressure. The goal is to recreate rain, not force water into places it would not normally go.
  6. Finally, pay attention to timing. A leak during rain points to exterior intrusion. Moisture on cold mornings may be condensation. Water after long storms may suggest saturated siding, poor flashing, or drainage problems above the window.

What You Can Do Right Away to Limit the Leak

Short-term fixes can limit the damage, but they should not become a routine after every storm. If the leak keeps returning, the source still needs to be corrected.

If you see small gaps in exterior sealant, remove loose material and re-caulk with an exterior-grade sealant on a clean, dry surface. Do not apply new caulk over wet, dirty, or rotted material.

Clear window tracks and weep holes so trapped water can drain. Check gutters and downspouts near the window, especially if water is overflowing onto the wall above the opening.

Inside, dry the area as soon as possible. Use fans or a dehumidifier if moisture has reached the sill, trim, or drywall. Take photos after each leak so you can track whether the problem is spreading.

Avoid the common mistake of sealing every visible opening. Some openings are designed for drainage. Blocking them can trap water inside the frame and make the leak worse.

Repairs That Actually Address the Source of the Leak

A lasting repair has to match the source of the leak. Caulk can help when the issue is a small exterior joint, but it will not solve every window leak.

If the sealant has failed, the old caulk should be removed and replaced with a continuous exterior-grade bead. The surface must be clean, dry, and stable for the seal to last.

If flashing is the problem, the repair may require removing trim or siding around the window to correct the water barrier. This is more involved than surface sealing, but it is often necessary when water is leaking from the top of the frame.

If drainage is blocked, the solution may be as simple as cleaning weep holes and tracks. If water damage has softened the trim or frame, the damaged material should be repaired or replaced before the opening is sealed again.

If the leak comes from installation gaps, the window may need to be partially removed and reinstalled correctly with proper flashing, sill protection, and sealing around the opening.

And if the window unit itself has failed, replacement may be the most reliable option.

When Repair Is No Longer Enough

A leaking window does not always need to be replaced. Minor sealant gaps, clogged drainage paths, or isolated exterior cracks may be repairable. But replacement becomes more likely when the window or frame can no longer manage water properly.

Consider replacement when the frame is soft, warped, rotted, or no longer sealing tightly. It may also be time to replace the window if water keeps coming back after proper repairs, if the sash no longer closes correctly, or if moisture appears between the glass panes.

Age matters too. Older windows may have worn seals, weaker frames, poor insulation, or repeated drafts. If a leak is happening alongside these issues, another patch may only delay the same problem.

Still, the source matters. If the water is entering through siding, flashing, gutters, or the wall above the opening, replacing the window alone may not stop the leak. The surrounding assembly has to be corrected too.

If the Window Needs Replacing, Consider Max Windows

If the leak is tied to a damaged, outdated, or poorly performing window, replacement can be the cleaner long-term solution. This is especially true when the frame has softened, the sash no longer seals, or moisture problems continue after targeted repairs.

In that case, Max Windows are worth considering as a long-term replacement option. Their durable construction and tighter fit can help reduce weak points where air and moisture often become a problem, while also supporting comfort and energy efficiency inside the home.

Even the best window needs proper flashing and installation to keep water moving away from the opening. When Max Windows are installed correctly, they can help restore a more reliable window system and reduce the need for repeated short-term repairs.

Start With the Source, Not the Caulk Gun

Water leaking from a window frame should not be ignored, even if it only appears during heavy rain. Small leaks can move behind trim, drywall, insulation, and framing before the damage becomes visible.

Before sealing or replacing anything, identify where the water starts. It may be failed caulk, poor flashing, blocked drainage, frame damage, condensation, or an issue above the window. Once you know the source, you can choose the repair that actually solves the problem.

The earlier you catch the source, the less likely the leak is to spread into drywall, trim, insulation, or mold repairs.


Leave a Reply

Your email address will not be published. Required fields are marked *